
archives for 04/2009
 We rushed up the highway into
another world. Farms are horse pastures surrounded by painted
wood fences. Home prices are slung in bold type on billboards ---
"from the high $200s". I imagine what would happen if life as we
know it came to an end while we were stuck in this madness --- how we'd
barter the six dozen eggs we'd brought as hostess gifts in exchange for
gas to get us home, or maybe would find our way to the Appalachian
Trail and eat our eggs as we marched south.
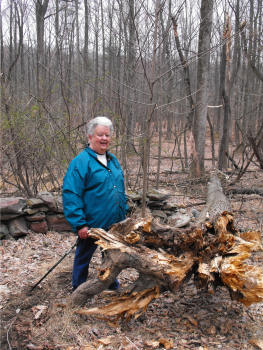
Tuesday night, we stopped to visit Sheila on a thousand acre property
on the side of the Blue Ridge --- a breath of fresh air. I've
known Sheila for 8 years, and she hasn't changed a bit, except maybe
looking more alive every year. This is what I want to be like
when I reach my 70s, bushwhacking up the side of a creek with the wind
roaring through the trees.
April gives a bit of a
reprieve from spring planting around here. Your cold weather
crops should have gone in already and your warm weather crops aren't
ready to hit the soil just yet. Here's our planting calendar for
April:
 April 1 - 7:
- Plant lettuce. You'll notice that I plant fresh lettuce every month in the winter and early spring --- that's the trick to sweet leaf lettuce without a hint of bitterness. This is the first planting in the bare soil with no protective cold frame.
- Start tomatoes and peppers. Last year, I discovered that my tomatoes grew much better in a cold frame than under a grow light in the house, and this year I want to try peppers the same way. Cold frame tomato seedlings are used to a bit of chilly weather, have less transplant shock, and are never leggy.
- April 8 - 14:
- Take advantage
of this lull to start weeding
the garden in earnest. Tiny weeds sure are a lot easier to pull
before they put down taproots. (Or go out and look at the
wildflowers like the Rue Anemone here.)
- April 15 - 21:
- Set out your broccoli seedlings.
- April 22 - 30:
- If you haven't already, take this week to prepare the soil for the big May rush --- form your raised beds, add in compost, etc.
Enjoy the peace and
quiet while it lasts --- the first of May brings gardening craziness.
 Every gardener should have an
indoor/outdoor thermometer which records maximum and minimum
temperatures. Especially in the spring, temperature is very
important, and your local weather forecast is likely to be off by up to
15 degrees, especially if you live in the mountains. By writing
down the daily maximum and minimum, you can start to figure out what
the temperature is really going to be like, and whether those peach
flowers need some protection from an unexpected frost.
I admit that I tend to obsess over keeping data like this, so when my
thermometer stopped showing external temperatures last week, I felt
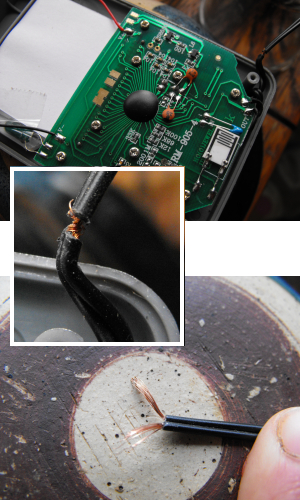
lost. I finally took a look at the unit, after days of mourning,
and realized that the sensor wire had twisted partway loose.
Totally fixable! I unscrewed the thermometer casing, cut the
sensor wire all the way loose, and stripped the plastic off the two
ends of the wire. The wire was actually two wires, so I carefully
twisted one cut end on the thermometer side to one cut end on the
sensor side, wound that wire in electrical tape, and repeated with the
second wire. Success!
Mark's usually the fix-it guy around here, but it sure feels empowering
to fix it myself. 
 I've often wondered how long it will take
to have smart enough robots for practical everyday chores.
The folks at MIT's
artificial intelligence lab are making me believe that day may be
sooner than I imagined.
Their robots are constructed from modified Roomba
vacuum robots, which might not handle the real world gardens out there,
but the concept has a lot of potential. They have a promising project
that uses a swarm of robots working together to tend to an experimental
tomato garden. I think a weed pulling robot could be very handy and fun
to watch, but that day is most likely in the very distant future.
Home,
home,
home,
home,
HOME
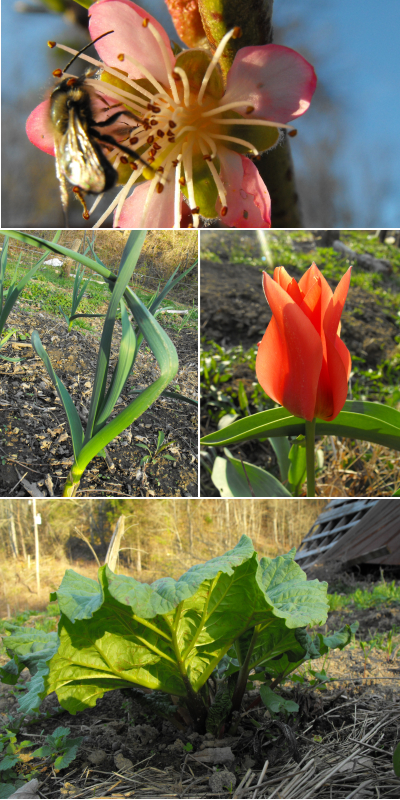
Okay, so I promise you a post with substance tomorrow. Let me
just tell you that in the last five days, the farm has turned so green
it took my breath away.
We are so glad to be back!
 Besides catching up with wonderful old
friends, the highlight of my trip was a visit to Longwood Gardens on
Friday. I know I blab about plants endlessly, but the truth is
that I often get bored by gardens which are simply ornamental with no
fruits or vegetables. But despite being beautiful, Longwood was
anything but boring.
Another
photo of the beautiful Longwood, and some of its features....
Finally someone has made a weatherproof time
lapse digital camera. It can take a picture every hour for a few
months before the batteries need to be replaced, or you can adjust the
interval from 5 seconds to 24 hours.
It gives a whole new meaning to that favorite past time of watching the
grass grow. Now you can watch the same grass grow over and over.
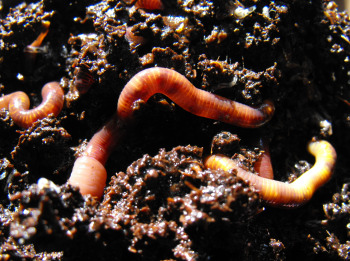 I've been meaning to post a
worm update for a while, so I appreciate the question. The savvy
reader will recall that we were given a
bunch of worms three and a half months ago and made
them a low tech worm bin which gave us a bunch of compost tea a
month later. And then I stopped talking about them.
The reason you didn't hear any more about worms is because they are
the easiest livestock you'll ever have....
 We're just back from five day
trip through the urban mid-Atlantic states and what do I want to talk
about? Espaliered fruit trees, of course. This photo shows
an
espaliered fig inside the conservatory at Longwood Gardens.
"Espalier" refers to a fruit tree trained against a flat surface,
traditionally a space-saving technique used along the inside of
defensive town walls in the Middle Ages. Nowadays, people just
think they're pretty, and I agree. But as more and more of our
readers begin to create their own mini-homesteads in small urban yards,
I thought it would be worth focussing on espalier techniques for this
week's lunchtime series.
Do you have an espaliered tree? If so, drop me an email with some
photos! If not, stay tuned --- you'll soon be hooked. If
you can't wait until tomorrow, check out this
page's extensive gallery of espalier fruit trees or read this longer
explanation of the benefits of espaliered trees.
Note: "Espalier" is pronounced "i-spal-yer".
| This post is part of our Espaliered Fruit Trees lunchtime series.
Read all of the entries: |
A fun wedding can only lead to a marriage filled with fun.
This was a very fun celebration with lots of warm and happy folks
wishing Seth and Melissa a ton of love.
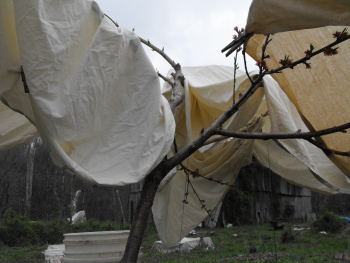 It was 39 F at sunset, the forecast was for a
low of 29 F, and the critical temperature at which 90% of our peach
blossoms will die is estimated at 28 F. Oh, and did I mention
that this is the first year our peaches might bear fruit and I'm dying
to taste them?
Yes, I went a little overboard and wrapped both fruit trees in all of
our spare bedding. I filled up 5 gallon buckets and the washtub
with water to sit below their branches in an effort to create a
microclimate warm zone. I stopped myself before I got to the
point of trying to set up an irrigation system to sprinkle the blooms
overnight, though --- I do have limits.
And, of course, the outside temperature only dropped to a very safe 32
F. It's supposed to get down to 27 F tonight, though....
Only time will tell whether my swaddled peaches make the cut.
 On our
long drive up the interstate, we stopped at a feed store outside
Staunton. Mark wanted to see about selling our do it yourself chicken waterers
in a brick and mortar store, and I'm a sucker for browsing through the
fruit tree section.
Along one side of the "outdoor living" section, I was intrigued to find
an sapple trained into the beginning of an espalier system. The
tree was probably four years old and had two nearly
horizontal branches spreading out from each side of the main trunk (an
awful lot like Monday's fig.)
I wasn't planning on buying it, but I was so intrigued to see an
espaliered fruit tree for sale that I checked the price tag.
Sixty bucks!!! I hope none of you rush out to your local nursery
and pick up a plant like that. Stay tuned and I'll give you step
by
step directions to prune and train your own espaliered tree.
Note: The trees in the photo are more
espaliered trees from Longwood Gardens, this time nectarines.
| This post is part of our Espaliered Fruit Trees lunchtime series.
Read all of the entries: |
We had blizzard like conditions at the Wetknee farm that kept me
working indoors most of today. I discovered a bounty of royalty free music on
the internet that will work in nicely with the video project I'm
editing. It's easy to download MP3 formats, and the introductory
descriptions make searching for specific music speedy and efficient.
 Okay, so I figure about 60% of you will be
seriously squicked by this post. Feel free to skip it.
Well, squick-free 40%, you will be glad you stayed on board.
Because two weeks ago I saw an ad in a magazine which broke through my
internal ad-blocker software. "Eliminates the need for toilet
paper!" it exclaimed, and I perked right up. I visited Krista's pStyle website, and
before I knew it, I was hooked.
The pStyle is a little plastic cup/funnel which fits between your legs
(women only, but guys obviously don't need one) and lets you pee
standing up. Our "outhouse" (such as it is) is a good little
distance from the house, so I generally don't wander all the way over
there to pee, especially if I'm hard at work in the garden. Plus,
if you pee in the yard, it attracts scads of butterflies. I'm
pretty good at squatting, but let me tell you, there's splattering now
and then, and drips at the end. And, in the winter, it's cold. The pStyle solves all
that.
Once you get over your gender normative reaction, you might come on
board too. Here are a couple of testimonials
from other rural livers....
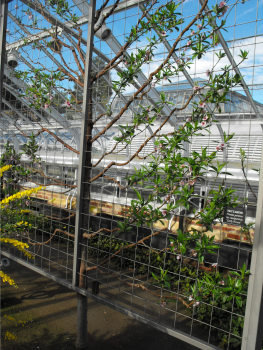 So, you want to create an
espalier fruit tree without paying $60 for a starter? Don't worry
--- many types of fruit trees can be grown using the espalier
technique. It's really just an exaggeration of the pruning and
training techniques you'd use on your free-standing fruit trees.
Your first step is to find an appropriate tree. Apples and pears
are highly recommended (along with citrus if you live in a suitable
climate.) Peaches and nectarines (like the one shown here) are
supposed to be more difficult, especially if you want to grow them in a
system with horizontal limbs like Monday's fig. European plums,
cherries, and apricots are not recommended.
Choose a tree grafted onto a dwarf rootstock so that it won't try to
take over the world. You'll want to find a one to two year old
"unbranched whip" --- basically, a tree which is young enough to only
be a trunk with no side branches. As usual, consider what zone
you live in, disease resistance, and pollinators.
| This post is part of our Espaliered Fruit Trees lunchtime series.
Read all of the entries: |
We finally got around to putting the new bee
boxes together this afternoon.
I'm really glad we went the extra mile when we bought the standard hive
tool pictured here. I guess we could get by without it, but after using
it for scraping the excess wood from the new frames and comparing that
process with a knife, I'm convinced this tool was worth the money.
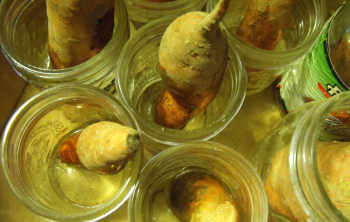 Irish potatoes can be cut
into chunks to plant, but starting your own sweet potatoes requires a
bit more TLC. Tubers are generally sprouted in either water or
moist sand, beginning at this time of year. Each tuber can create
a dozen shoots, which are then broken off and put in water to grow
roots. These "slips" are then planted in the garden after all
danger of frost is past.
Last year was our first attempt at creating our own sweet potato slips,
and it was pretty much an abject failure. We put tubers in jars
partially full of water and watched as the tubers slowly rotted into
gelatinous blobs. Then we went to the feed store and shelled out
far too much cash to buy slips.
This year, I've resolved to do better. I think our problem last
year was that the trailer is very chilly at this time of year as we
move out of wood stove season. We wear sweaters, but sweet
potatoes are unthrilled by sweater weather and instead require warm
room temperature for sprouting. So this year, we've put a car
seat heating mat under the tubers and a space heater beside them.
The space heater only goes on at night when it's really chilly, but
I've had the heating mat on constantly since Monday and already a
quarter of the tubers have started to sprout! I'm keeping my
fingers crossed, but so far the experiment seems to be doing well!
| This post is part of our How to Start Sweet Potato Slips series.
Read all of the entries: |
 Now it's time to choose your training
system. There are scads of shapes out there to choose from, but
they come down to one basic decision --- will your main branches be
horizontal, vertical, or at an angle?
Longwood Gardens has discovered that you get the maximum fruit per tree
by using a 45 degree branching angle, like the one shown in the bottom
picture. This shape is often referred to as a "fan" and is also
one of the few espalier techniques which really works with peaches and
nectarines. If you want your garden to wow the neighbors, though,
you might consider creating your own artistic shape. Just keep
the optimal branch angle in mind!
Your chosen training system will help determine what kind of trellis or
other support system you'll build. Walls are a traditional
support --- keep the espaliered fruit tree about six inches from the
wall to allow for air flow and attach the trunk and branches at
intervals with eye bolts or anchors. Wooden or metal trellises
can also be used.
| This post is part of our Espaliered Fruit Trees lunchtime series.
Read all of the entries: |
The quest for an affordable mulching mower
with big wheels and a bag attachment was completed today thanks to a
nice guy on Craig's list.
Lawn clippings are some of the best mulch you can use on the garden,
and now we can take advantage of the lush grass that's been growing in
patches around the trailer.
I'm coming to the realization that a person can find anything and
everything with a bit of browsing and patience on Craig's list.
 Nail
placement on bee frames seems to be a bit of a thorny issue --- either
that or it's just difficult to explain. The best description I came
across is here,
but even that one gave me fits.
These photos show my best guess of nail placement. I put eight
nails in each frame --- two in each side of the bottom bar (see below),
and four through the side panels into the top bar (see right.)
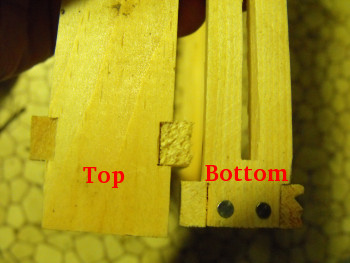
Note that the top
bar is
asymmetrical due to removing the foundation-retaining wedge, so the
nails which go into the top bar are placed asymmetrically.
Although many websites recommend putting nails
through the middle of the top bar, I was sold on horizontal nails for
two reasons. First, nailing vertically through the top bar
doesn't give the frame any structural support against the weight of the
honey pulling the frame apart vertically. Second, one website
mentioned that nailing into the top of the top bar makes it difficult
to scrape the frame clean.
Frame nailing has definitely been the most tricky part of the hive
assembly process. I hope I did it right! Meanwhile, if you
want a bit more procrastination before you begin your work day, you
should totally check out this blog entry about the
new White House bees.
 Now for the fun part --- pruning and
training! Basically, pruning and training an espaliered fruit
tree is a lot like pruning and training a free-standing fruit
tree. In both cases, you use judicious cutting to get the tree to
branch or change direction, then you tie the resulting limbs into
place. The trick is that you need to stay on top of it --- no
ignoring the espaliered tree for eleven and a half months then whacking
at it one winter day. Instead, you need to use winter pruning and
summer pruning to create a solid skeleton. Meanwhile, train the
branches onto their support, catching new branches as they form when
they are easy to mold to your will. The
best in depth description I've found on the internet is here.
An espaliered fruit tree
may take up to a decade to train into its eventual shape, and you
should be aware that espaliers will also take longer than a freeform
tree to fruit. But Europeans heartily believe that the resultant
plant is healthier and more productive than its wilder
counterpart. I'm not sure I'm ready to give it a shot, but city
dwellers could do worse than an orchard of fruit trees trained against
the side of their house.
| This post is part of our Espaliered Fruit Trees lunchtime series.
Read all of the entries: |
The guy we bought the bee hive supplies from
had some good advice about painting bee boxes.
He recommends the big box stores of Lowes and Home Depot because they
usually have a few cans of mixed latex paint that didn't quite turn out to be
the right shade of a color they were going for. These cans are a
fraction of what they usually charge.
Most people paint their boxes white, but he points out how they stand
out from a distance, and a more appropriate color might discourage the
random bee box thief. Luckily we don't have that problem here due to
being tucked so far back in the woods.
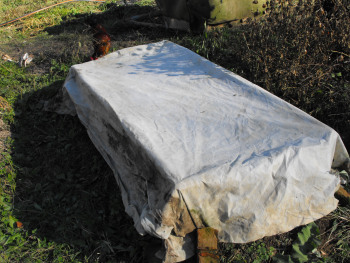 I swear by row
covers. I use heavy ones on my cold frames instead of glass,
which means I don't have to water or worry about overheating. I
use light ones on the deer's favorite foods to protect them from
nibbling. In fact, I could use about forty times as many row
covers as I now have.
I used to be able to get row cover fabric really cheaply since folks
around here used it to start their tobacco beds in the spring.
But after the tobacco market stopped being subsidized and most folks
stopped growing tobacco, row cover fabric became hard to find. I
hate to buy it from online magazines because it's really pricey, and my
current stash has been slowly decaying.
But Gardens Alive! just made my day. They sent me a catalog with
a coupon for $25 off your order of any size. I can get 55 feet of
row cover fabric for $1.90 after I add on the shipping and subtract off
of the coupon savings. If you've bought things from Gardens
Alive! in the past, you'll probably get a similar catalog --- keep your
eyes peeled. If not, you might be able to order the
catalog with coupon
online here. Unfortunately, I can't seem to get the online
order form to accept my coupon, but it's worth the cost of a stamp to
get so much row cover so cheap!
Gary
Larson has given me more laughs and chuckles than all other comic
artists combined.
His surreal sense of humor has really spoken to me in the past, and I
was one of the many folks who were bummed out when he retired
in 1995.
The reason he stopped even makes me admire him more. He felt like it
was getting repetitive, and didn't want to be trapped in what he called
the "Graveyard of
mediocre cartoons".
His artwork and punch lines still hit me where it's funny, and I wished
more comic strips would follow his lead by making such a graceful exit
when they feel like all the good jokes are used up.

In April, the garden changes from a world of potential to a real world of accomplishments and disappointments. I had a little of both yesterday. The disappointment is that the battered row cover fabric I'd used to cover my broccoli and cabbage cold frame had tattered to the point it lost its protective powers --- my crucifers are pretty much shot.
 The most exciting positive is
the Marbled Salamander, shown above, which I found under a board in the
garden. The first strawberry blooms are nothing to sneeze at
either!
The most exciting positive is
the Marbled Salamander, shown above, which I found under a board in the
garden. The first strawberry blooms are nothing to sneeze at
either!I've been sick all week --- too much city last week --- so I only got a chance to put in my tomato and pepper cold frame Saturday afternoon, ten days later than I'd planned. I suspect the lateness won't make too much difference, but I poured a little extra love on the seeds just in case.
 It's that time of year when male rabbits fight other males for the
privilege of mating with a female.
The female often turns the male down a few times before she gives in,
making the process look a bit crazy and out of character for the
normally quiet and reserved bunnies.
This is where the phrase "mad as a March hare" comes from, which might
explain why some chocolate bunnies will arrive with an ear missing, or
maybe one of the parents got hungry while building a few Easter baskets.
 Varroa mites are the worst pests affecting
honeybees in our area. In fact, most
beekeepers around
here will tell you that you can't keep hives without using chemical
treatment
for mites --- they put in chemical strips religiously every fall to
kill off the arachnids.
Of course, telling me I can't do something is like waving a red flag
in front of a bull*, so I'm bound and determined to prove my friends
wrong. If you need a more scientific reason to forego the
chemicals, you should also be aware that beekeepers are overtreating
and the mites
are developing a tolerance to the chemical.
One of the causes of our varroa mite epidemic is the foundation most
beekeepers fill their frames with. Foundation is a thin sheet of
beeswax imprinted with hexagons to show the bees where to build their
comb. The foundation does a good job of keeping the bees from
building crooked combs, but the width of the store-bought hexagons is
significantly larger than the width of hexagons bees would build by
themselves with no foundation. The larger cells give the varroa
mites lots of room to slip down into the cells with bee larvae and suck
them dry, but beekeepers put up with it because the larvae that do
survive tend to be bigger and are able to produce more honey. So what's the
solution?
| Read other posts about foundationless frames and varroa mites: |
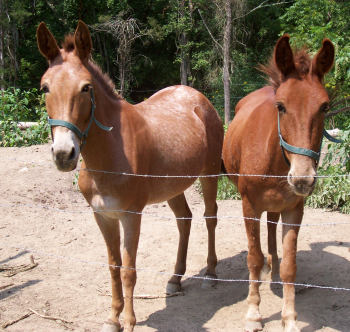 Mark and I spent lunch on
Saturday brainstorming our biggest mistakes made on the farm, hoping to
come up with five "don't repeat our mistakes" for a lunchtime
series. Between my lack of memory and his optimistic bent, we
were unable to list more than three big mistakes though ---
buying mules when neither of us has dealt with equines, planting fruit
trees before we had the infrastructure to care for them, and...was
there something else?
Then we wandered off into a discussion of the top five things we'd done
right as early homesteaders. Our trailer quickly leapt into the
number one position. I know that many folks consider living in a
trailer a miserable failure, but for us it's been a stunning
success. And so this week's lunchtime lecture series is all about
the trailer --- how we got it, why we got it, and why we love it.
| This post is part of our Low Cost Housing lunchtime series.
Read all of the entries: |
On a bookkeeping note,
Michelle is the winner of our spring
giveaway! Michelle, drop
me an email with your mailing address and I'll put your goodies in
the mail to you ASAP! I really appreciated hearing all of your
comments, and I hope you'll keep commenting even though the giveaway is
over.
The shipment of honey bees arrived early today. They were shipped from
Kentucky on Saturday.
We were a bit alarmed to see our separately packed queen was not alone.
There were several other worker type bees inside her little cage.
The book never mentions this fact, and we were a bit concerned
something was wrong.
Turns out the queen can't live that long without having one of the
other bees feed her, and we just assumed she got fed through the holes
in her little cage...not true. She comes shipped with enough help to
get her through the early days of travel and home building.
Befuddled bees hover as
I clip lettuce, read in the sun.
Our new winged livestock
seem unready to sip nectar, fill their hive with honey. Instead,
they push the grass aside and slip in and out of the tiny hole in their
wooden box.
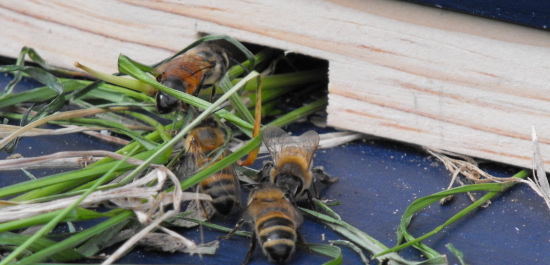
They test the air around
my body, smelling the sugar syrup I sprayed on their travel crate to
calm them. Maybe they catch the scent of the queen whom I
momentarily slipped into my front pocket to protect and keep warm.
I can see the bees
sniffing, tasting. Is it captivity if you choose to live in a painted blue
box? If you choose to accept the ministrations and thieveries of
a warm-blooded mammal? Or is it friendship?
 You won't see trailers
discussed much in the homesteading world. Everyone wants to build
their dream home, and I have to admit that I began my homesteading
voyage with a similar inclination. I researched strawbale houses,
earthships, and cob. I drew floorplans and crunched the numbers
on passive solar heating.
And then I crunched some less enticing numbers. Using a very
lowball figure of $20 per square foot, a twenty by twenty foot house
would cost $8,000 to put together, plus months of labor. Neither
Mark nor I was interested in getting a full time job just to pay for
building a house, and we knew that if we jumped into the rat-race we'd
have to hire folks to help us build the house since we'd no longer have
time to do the building ourselves. When I sat down and thought
about it, I realized that what I wanted was to be on the land right
away, to be putting energy into creating a wonderful garden.
"What about a trailer?" Mark asked tentatively. "We could move in
almost right away, and then if we want to build a house later, we
can."
As usual, his suggestion was brilliant. A trailer it was!
| This post is part of our Low Cost Housing lunchtime series.
Read all of the entries: |
Seed-tape.com might be
a solution for those of you out there who want to have a garden this
year but already feel like the time is slipping away.
We plant seeds the old fashioned way around here and it's worked out
pretty good so far.
The strips are biodegradable and take the guess work out of spacing,
which can be a problem with tiny carrot seeds.
Of course seed planting is only a small part of getting started for the
year...just keep in mind that a thousand mile journey begins with the
first step.
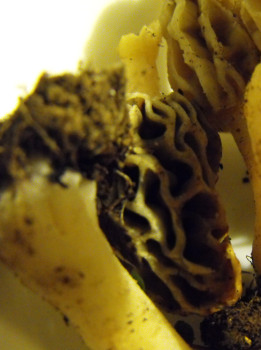 Around here, folks guard their morel-hunting
grounds with as much secrecy (though less firepower) than they use on
their moonshine stills. I distinctly remember a friend of mine
telling me about the bags of morels ("dry land fish") he hauled out of
the woods one spring, adding that there were so many present that he
left behind over half of the mushrooms. "Where are they?" I asked
naively. "I'd love to gather some morels." "Oh, up that
holler there aways," he said vaguely, pointing his chin toward two or
three valleys in the distance.
Mark's friendships are obviously stronger than
mine. He came home
on Monday with a little mess of morels which he and his friend had
gathered together. 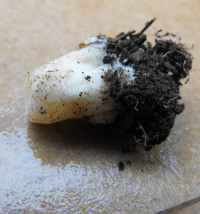 I was ecstatic because I'd been dying to try
out my mushroom
cultivation techniques, and now I have the raw material to do
it. I cut the stem butts off and slapped them between wet
cardboard. Another fun experiment!
 Our initial search for a trailer took us far
afield. We hunted through classified ads, looking at trailers in
the $1,000 to $2,000 range. The world was astonishingly full of
trailers for sale --- big ones, small ones, trailers reeking of cat
pee, and fresh new trailers which seemed as fancy as any home I'd lived
in.
Then reality struck. The price of the trailer wasn't the big
consideration; location was. We were going to have to hire a
trailer-hauling company to transport our new trailer and those
companies didn't come cheap, so the closer our find was to the farm,
the better. We stopped reading classified ads and started rolling
down back roads near our farm. Within hours, we stumbled across a
trailer park fifteen minutes away and asked its proprietor if he had a
trailer he was willing to sell for $2,000 or less.
"You can have that one there for free," he said, pointing at a
1960s model, windowless and empty at the edge of the park. "If
you haul it off." And that's how we found our new home.
| This post is part of our Low Cost Housing lunchtime series.
Read all of the entries: |
I modified the mounting on one of the chicken
tractors in an effort to simplify things even more. Now there's no need
to open the front door when topping off the water level.
Two Avian Aqua Misers side by side give your hens a choice, and it might
take them all season to determine which one has the best water.
 Our new mulch machine is the most
amazing lawn mower I've ever touched. It starts on one
light pull, and runs so quietly and smoothly! Then out of its bag
comes delicious clippings which, after drying on a tarp on a sunny day,
turn into what Organic Gardening Magazine decided is both the most
aesthetically pleasing and the most nutritious (highest nitrogen)
mulch around.
Last year, I struggled to keep the "lawn" mowed. This year, I'm
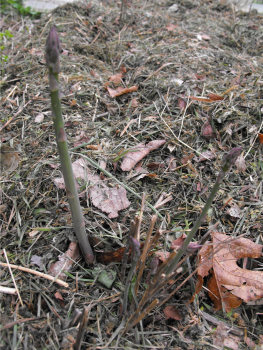
begging the grass and weeds to grow faster! One cutting yielded
only enough to mulch a single asparagus bed and I've got a couple
hundred more beds in need of weed control. I guess I'll have to
hunker down and deal with weeds the old fashioned way.
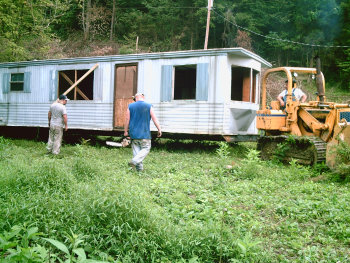 We were lucky that our free
trailer was small --- 10 feet wide by 50 feet long. Because when
we got the trailer-hauling guys to come look at our property, they said
a larger trailer would have been impossible to move in. Even for
our tiny trailer, we had to cut big openings in the forest at each
curve in the driveway to give the trailer room to maneuver
around. And we had to wait and wait and wait until the driest day
of the year when a bulldozer wouldn't get stuck in our floodplain.
My father was never keen on the idea of me living in a trailer, and
though I have happily ignored that piece of advice, I wish I'd taken
his
advice to absent myself from the farm on moving day. At a rate of
hundreds of dollars per hour, I could see my small stash of backup cash
slipping away with every hangup. I watched our crew jack the
trailer up so that it could roll across the creek, my heart in my
throat, and I gulped as a low-hanging branch ripped a hole in the tin
wall. But, finally, the bulldozer yanked our new/old trailer into
the spot we'd mowed for it between the blackberry brambles. Home!
| This post is part of our Low Cost Housing lunchtime series.
Read all of the entries: |
Mark
Frauenfelder had an interesting post on his automatic chicken coop
door he put together based on an informative page at buideazy.com.
The meat of such a contraption is a device known as a drapery motor
controller, which takes the guess work out of when the door stops and
starts and has some built in safety features.
Be prepared to spend around 100 bucks on the motor once you get it
shipped, and maybe 20 to 50 more on the door and rail system. A remote
control is available for an additional 20 dollars, just make sure you
keep it out of reach from wiley coyotes and the random fox.

Edited to add:
After years of research, Mark eventually settled on this automatic chicken door.
You can see
a summary of the best
chicken door alternatives and why he chose this version here.
If you're planning on
automating your coop, don't forget to pick up one of our chicken waterers. They never spill or
fill with poop, and if done right, can only need filling every few days
or weeks!
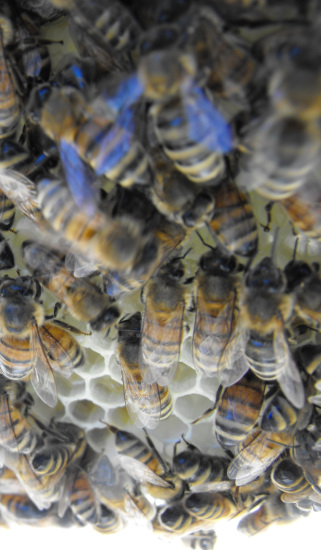 Yesterday was the big day --- time to open up
the hive and see how our new friends are doing. Mark's still
fighting off the plague, so I decided to leave him in bed and open up
the hive myself. I have to admit, I was intimidated by the idea
of hundreds of stinging insects whizzing around my head, so by the time
I finished up my computer work and headed outside my stomach was in
knots.
I got the smoker lit and popped off the hive lids, bees flying in every
direction. After I finally took a deep breath, though, I realized
the bees weren't really all that concerned about me. I puffed on
a little smoke, but it didn't seem to be necessary.
All is well in our new hive. The queen has eaten her way out of
her traveling cage, and her workers are already building comb in three
or four of the frames. The foundation strips had fallen out of
two other frames, so I fumbled around for a while, brushed the bees off
the frames, and replaced the foundation. I also took out the
entrance reducer and moved the sugar syrup feeder to the front of the
hive so that I could remove the extra brood box (and see how full the
feeder is without disturbing the hive.)
I was a bit too intimidated to really poke at the newly drawn comb and
see whether there were any eggs visible --- which would be proof
positive that the queen hasn't flown the coop. I'll check the
hive again this weekend, by which point I hope to have built up a bit
more courage. Because, really, I had nothing to worry
about. Our bees continue to be exceedingly gentle. I'm very
glad we chose the gentle Italians, even though they're not as disease
resistant as some other varieties.
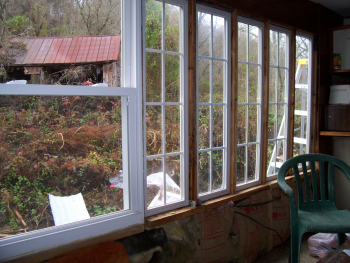 Over the next few months,
Mark filled the gaping holes in the trailer's walls with double-glazed
windows which we'd gotten free or cheap over the last couple of
years. We ripped up ancient carpet to reveal not-too-bad
linoleum, hauled out a broken washer and dryer, and mended a few leaks
in the roof. Overall, I'd say we put maybe $2,500 into our 500
square foot home --- $5 per square foot --- and the vast majority of
that went to the trailer-hauling company.
There are two major downsides to living in a trailer. First of
all, your snooty friends will sneer a bit (but who cares?) More
important, the insulation is minimal. However, the positives
vastly outweight the negatives. After our initial startup cost,
we can now live on next to nothing. After all, while most folks
around us are paying rent or a mortgage, our housing bill comes down to
a measly $200 per year that we throw at the county in property taxes.
I consider the trailer one of Mark's biggest strokes of geniuses
because it has let us work very part time jobs and pour our hearts and
souls into becoming more self-sufficient. If you subscribe to
voluntary simplicity, you could do much worse than scouring the
countryside for a free trailer to live in.
| This post is part of our Low Cost Housing lunchtime series.
Read all of the entries: |
How can
I make a cheaper chicken door opener with parts I can find around my
neighborhood?
Tom: Ashland, OH.
A car lock actuator is what Rob from Nifty-stuff.com
uses. He found two electric car lock actuators on ebay for 11 dollars
shipped, which is a lot cheaper than the drapery motor controller.
A junk yard might be a good place to find cheap actuators.

Edited to add:
After years of research, Mark eventually settled on this automatic chicken door.
You can see
a summary of the best
chicken door alternatives and why he chose this version here.
If you're planning on
automating your coop, don't forget to pick up one of our chicken waterers. They never spill or
fill with poop, and if done right, can only need filling every few days
or weeks!
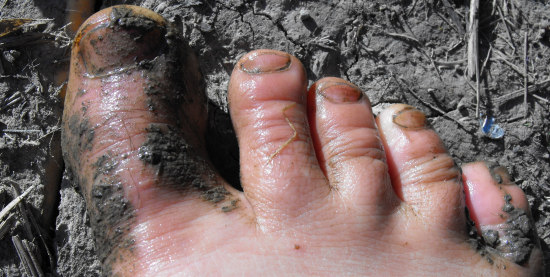
When my head is buzzing and I can't find the present moment with two
hands, I slip off my shoes and take a few steps. The hamster
wheel in my head slows to a halt and I hear a Lousiana Waterthrush's
clear notes from the trees above my head. I feel the remnant of
winter coldness in the ground, realize that tree roots are slipping
through the mud under my feet.
All of my life, people have told me to put my shoes back on. I
think that Thich Nhat Hanh would have
understood, though. After all, he wrote:
"If you are trained in walking meditation, with each step you can experience peace, happiness, and fulfillment. You are capable of truly touching the earth with each step. You see that being alive, being established fully in the present moment and taking one step, can be a wonder, and you live that wonder in every moment of walking."
So take off your shoes and take a step. I promise you, it's
cheaper than therapy.
This clever
design makes use of some salvaged photocopier parts, which brings a
more elegant, and futuristic style to the farm.
I still prefer the low tech method of a properly designed chicken
tractor, although not everybody has that much green space to spare.

Once in a while, I ponder what it would be like to live in the tropics,
where I could grow fresh food year round. At other times, I
marvel over the deep snow of the north. But the truth is that I
adore our seasons so much that I couldn't live anywhere else for long.
Yes, this is another spring adoration post. Trilling toads in the
night! Tulip-trees just starting to put out yellow-green
leaves. White dashes of serviceberry and pink patches of redbud
on the hillside. Dogwood flowers unfurling outside our
window. And the hillsides alive with the sound...er, color...of
trilliums.
While searching for a cheaper alternative to
power an automatic door I found this linear actuator that sells
for 30 bucks plus 14 for shipping.
It's rated to pull 450 pounds! Which is more than you need for the
average chicken coop door, but with a little imagination this device
could be used as a light duty gate opener and closer.
You'll need 120 volts of electricity to power it, unless you rig up
some sort of solar cell and battery combination.
This could also be used to open and close a window for green house
ventilation.

Edited to add:
After years of research, Mark eventually settled on this automatic chicken door.
You can see
a summary of the best
chicken door alternatives and why he chose this version here.
If you're planning on
automating your coop, don't forget to pick up one of our chicken waterers. They never spill or
fill with poop, and if done right, can only need filling every few days
or weeks!
 I ran across a new magazine a few weeks
ago that many of you may be interested in --- Countryside &
Small Stock Journal. It's put together by the same folks who
brought us Backyard
Poultry, and it has the same in depth articles and lack of
flashiness. (Think Organic
Gardening Magazine in the '70s before it turned into a mass of
color photos and ads.)
Countryside is intriguing because of its large section by readers --- a
full twenty pages of firsthand accounts from people who're living the
homesteading dream on a big or small scale. The one I read most
recently also had an article by a couple who were homesteading in
Canada, 100 air miles from the closest town. Wow!
While Mother Earth News
fills a similar niche, Mother is flashier and, after about a year,
became very repetitive. (I keep reading Mother only because every
month or two it comes up with a really cool article like this
one on biochar.) I don't know yet whether Countryside will
become equally repetitive, but from the breadth of topics covered in
the three issues I've read, I suspect not. If you're the magazine
type, I recommend you check Countryside out.
I never heard from
Michelle, the
winner of our spring giveaway. So I've drawn another name out
of the hat --- Maggie! I know where you live, so no need to email.
Your goodies will be winging their way toward you shortly.
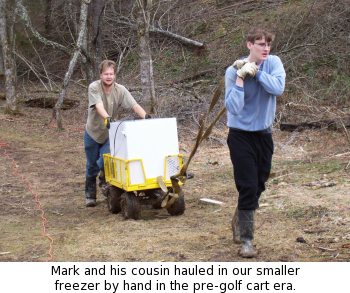 I spent all day Saturday
alternating between defrosting the big freezer and reading a book about
Alaska. It was a bit surreal --- as I hacked through the
rainwater-turned-ice which a leaky gasket had allowed to engulf my
food, I felt like I was single-handedly enacting a spring thaw.
The problem of our leaky gasket aside, the two free freezers we
acquired a couple of years ago have been some of our best farm
tools. I was raised on canned farm produce, and I'm here to tell
you that frozen farm produce tastes about ten times as good as canned
farm produce. It's better for you too.
So, in honor of the spring thaw, this week's lunchtime series is an
introduction to farm freezing. Stay tuned!
| This post is part of our Introduction to Farm Freezing lunchtime
series. Read all of the entries: |
The guys at Dragonflypower.com
have the cheapest automatic chicken coop door design I could find
during my search.
It's use of a basic alarm clock keeps the cost low, but I've
got some serious doubts on how solid of a solution this is going to be
for the long haul.
The complete design is being given away at their website in
what looks like an effort to promote their build your own wind
generator plans, which are 10 dollars.

Edited to add:
After years of research, Mark eventually settled on this automatic chicken door.
You can see
a summary of the best
chicken door alternatives and why he chose this version here.
If you're planning on
automating your coop, don't forget to pick up one of our chicken waterers. They never spill or
fill with poop, and if done right, can only need filling every few days
or weeks!
 See that tiny grain of rice on the left?
That's a bee egg --- proof positive that our queen is still in business.
On Monday morning, I walked Lucy, then carried that calm to the bee
hive for our second hive check. The bees were a bit chilly (55 F
outside), so I kept the visit quick, sliding each frame up for a look
before letting it drop gently back into place.
This time, I felt like I was dancing with the bees. I didn't
squash anybody, and I felt like I could have left all of the protective
equipment in the trailer. I was proud of their hard work ---
eight frames were being built on, all straight down despite our lack of
full frame foundation. Pictures after
the cut...
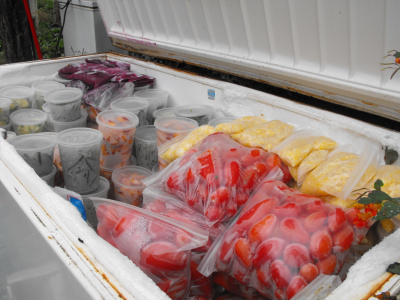 As a newbie to freezing,
my first question was "What can I freeze?" I soon discovered that
just about anything can go in the freezer. With our unlimited
freezer space, we even freeze things which taste just as good canned
---- like tomatoes. On a 90 degree September day, when you've got
a bushel or two of fresh tomatoes on your hands, you'll probably prefer
cutting off the tops and throwing them whole into freezer bags rather
than standing over a huge pot of boiling water at the stove for an
hour. I know I do.
I've run across only a few things which I wish I hadn't put in the
freezer. The biggest one is peaches. Last summer, I bought
a couple of bushel baskets of peaches and cut them all up, dreaming of
tasting summer peaches on a cold winter day. But when I
thawed them back out, I discovered that the fruit chunks had turned
flabby and brown
and lost a lot of their delicious flavor. This year, I plan to
can or dry my peaches.
Two years ago, I made a similar mistake with freezing basil and parsley
by themselves. The thawed out herbs were woody and flavorless,
but
luckily I froze lots of pesto which preserved the fresh basil
taste much better. If you're going to freeze herbs, try freezing
them in
oil, or just make up some spaghetti and pizza sauces in advance and
freeze those.
| This post is part of our Introduction to Farm Freezing lunchtime
series. Read all of the entries: |
I've been having some trouble with the chainsaw and was ready to take it in for a tune up. Anna mentioned how she
read in the Nov/Dec 2008 issue of Countryside magazine that
fuel with a 10 percent ethanol mix was not good for 2 stroke chainsaw
engines. I checked at the gas station and sure enough it had a 10
percent mix of ethanol. It seems like most gas stations around here
sell the ethanol enhanced fuel, but I got lucky and found one outside
of Gate City on route 23 that advertised non-ethanol fuel.
Some folks will say it's not that important, but all I did was empty
out the 10 percent ethanol fuel and mixed up some 2 cycle fuel with no
ethanol and my problems went away. This guy
suggests that the problem can be avoided by using the high octane
gas, which tends to cancel out the ethanol effect. My chainsaw is of
the older generation, and I'm going to keep ethanol away from it if
that's what it tells me to do.
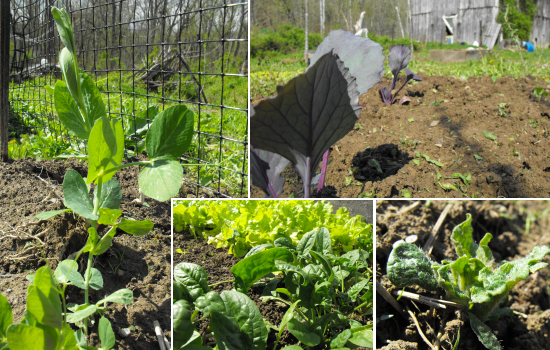
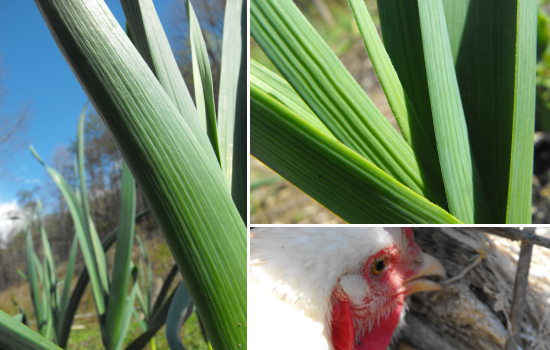
The garden grows --- peas on
the left, then cabbage sets (thanks, Mom!) on the top right, potato
sprouts bottom right, and salad greens center bottom. My garlic
is so beautiful it had to get its own photos at the end of the entry
(along with our broody hen.)
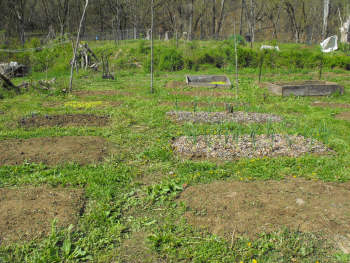 I've spent the last couple of
weeks starting to get a handle on weeding the garden. This photo
shows the quarter (fifth? tenth?) of the garden which I've gotten under
control in the last week. I figured I'd better take a picture now
since it probably won't look that weedless again until winter!
Our weeding method consists of mowing the aisles then hand weeding the
rest. Not the most efficient method, I admit, but hand weeding
works for me since I don't have to weed as often as I might if I was
hoeing. Mark dreams of flame weeders, but I just dream of more
mulch.
 My next newbie freezing
question was "How do I freeze food?" With pesto, tomatoes,
applesauce, and a few other things, freezing is as simple as throwing
the food in a bag and putting it in the freezer. But you'll want
to blanch most vegetables prior to freezing.
Blanching consists of cooking the food for a couple of minutes, long
enough to denature the enzymes so that the vegetables will stop aging
and will be preserved in the instant of summer freshness. I
prefer to blanch in a steamer, although you can put your veggies
directly in boiling water if you'd rather (though you'll lose flavor
and
nutrients!) Read more
about how to blanch....
| This post is part of our Introduction to Farm Freezing lunchtime
series. Read all of the entries: |
Since I've started learning about bees I find myself
paying closer attention to what's in bloom and wondering if it's enough
to keep our hive of worker bees busy.
You can barely see it in the picture, but the yellow wild flowers to the right
are Golden Ragwort, which started blooming last week around here, and
can be expected to produce pollen for about 3 weeks.
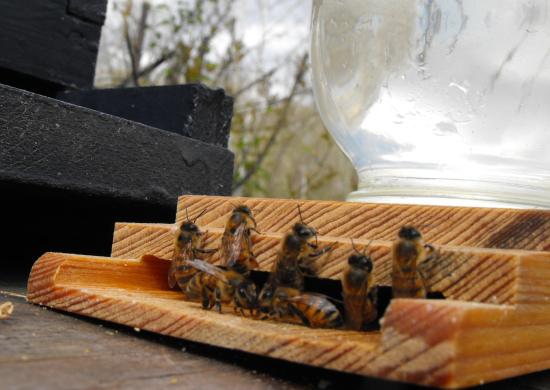
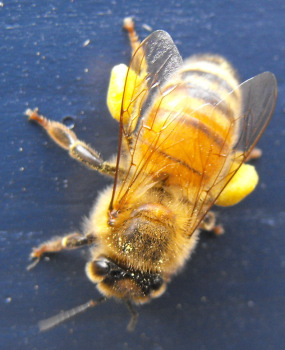
The book instructed us to feed our bees for the first few months to
help them get established in their hive, so I've been dutifully mixing
sugar with water and they've been lapping it up. Yesterday, I
pulled the feeder out into the open (it usually sticks into the
entrance) because it seemed to be leaking and I wanted to keep an eye
on it. Now I'm not so sure about leakage --- even out in the open
the bees consumed a couple of cups of sugar water yesterday.
I notice that the workers who go out on forays beyond the feeder all
seem to come back with full pollen sacs (like the one on the right),
which I guess means the sugar water is fulfilling their other needs
pretty well. That's the goal --- to give them a jump start as
they build up their colony.
I continue to be impressed by how tame our bees are --- I had the lens
nearly touching the bee above when I took her picture and I sat a few
inches from the hive for several minutes without wearing a veil, and in
both cases no one bothered me. Such good little bees!
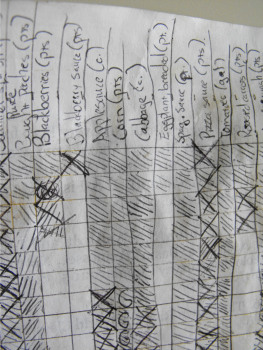 Careful notes are the
key to freezer success. I keep each type of food segregated in
the freezer and draw a map so that I can find things easily.
Since I clean out the freezer entirely every spring and freeze in clear
plastic containers, I don't even need to label my produce.
I do keep a very careful list of how much of each vegetable I've
frozen, though. Using a piece of graph paper, I list the name of
each vegetable at the top, then hash off a square for each cup, pint,
quart, or gallon (depending on the food) as I throw the day's produce
in the freezer. Once winter comes and I start pulling food out, I
cross off the squares for food I've used. That way I have a quick
visual estimate of what I'm getting low on and don't end up eating all
of the green beans in December and ignoring the summer squash until
February. Read more
about how much to freeze....
| This post is part of our Introduction to Farm Freezing lunchtime
series. Read all of the entries: |
Frank Aragona has an interesting company
by the name of Agricultural
Innovations. They are using technology to promote permaculture and
sustainable practices throughout the United States and Latin America.
I was really impressed with the block
press pictured to the right. Two people can make an average of 300
blocks in a day using this machine, which works on hand power. It
requires a mix of 90% dirt and 10% cement, although the earth should
have some clay and other minerals with agglutinating properties.
I just finished listening to episode 49 of his podcast, and if you like
this subject it might be something worth checking out. He's got a good
speaking voice and I like his style. I give his podcast two thumbs up.

I thought you all might be interested to hear how our sweet potatoes
are doing. Since we started
them a couple of weeks ago, 8 of the 12 tubers have developed roots
and/or sprouts. This is our best looking contender --- both roots
and a little sprout. I have high hopes that we'll be awash in
slips in a month when they're due to go in the ground.
| This post is part of our How to Start Sweet Potato Slips series.
Read all of the entries: |
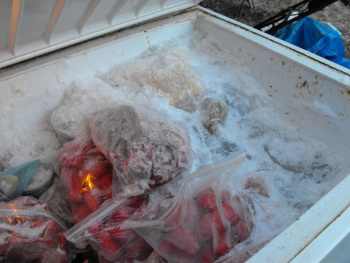 We're very lucky to own
both a huge freezer and a medium freezer, which makes our food
operations much more efficient. In the summer as we become
overwhelmed by vegetables, we start to fill up the small freezer.
By late summer, the small freezer is chock full, so we unplug it, plug
in the big freezer, and transfer our wealth over. And we keep
freezing more produce, of course, until the big one is mostly full.
As the big freezer begins to empty out in the spring, we transfer
everything back to the small freezer. This year and last, by
freezer transfer time, I've realized that I froze too much of certain
types of food, so I gave them away. It's a good feeling to be
able to fill your mother and brother's freezers, then give them some
extra to pass on to their fixed income friends. Read my last
few hints --- last chance meat and the Berry Syndrome....
| This post is part of our Introduction to Farm Freezing lunchtime
series. Read all of the entries: |
If you want to pump water in a place with
no electricity you might want to consider building a hydraulic ram pump.
It's a clever design that uses the momentum of flowing water for
pumping.
The Clemson
University cooperative extension website has a detailed explanation
of the process, complete with a step by step process on how to build
your own from plumbing parts and a bicycle inner tube for about 120
dollars.
It seems like the height your flowing water drops determines how much
pressure you can expect. You'll need at least a 2 foot distance to get
started.
 A couple of you have asked me if you can
be notified when new comments are posted on a blog entry. I told
you "no", but it turns out that, unbeknownst to me, there's been a way
to do that all along. When you make a comment on a post, you'll
notice that there's a little button at the top of the completed comment
which says "RSS". Click there and you'll be able to subscribe to
an RSS feed of the comments, just the way you can subscribe to an RSS
feed of our blog. If you want to be notified every time there are
comments on any post, click "Recent Comments" on the sidebar to the
left, then click on the "RSS" button at the top of the page you get
sent to.
While I'm on a technical note, I'm hoping one of you can help me out
with formatting our blog in Internet Explorer. I highly recommend
that everyone use Firefox
(or, really, any browser except IE) since Firefox is faster, free, and
protects you from web-borne viruses. But I'm aware that the 50%
of you who use IE get a messed up format from our blog --- the sidebar
looks twice as big as it should which makes the pictures eat our
words. If anyone out there is adept at finding a way to work
around IE's problems with tables, please drop me an email and I'll send you
our template to look at. I'd be eternally grateful!
Today was our mandatory bee workshop class in
Abingdon.
We were both concerned that it might be a long day of sterile
instructions in a boring class.
I'm happy to report that the day whizzed by with an energetic and funny
expert who is also head of the entomology department at Virginia Tech.
His enthusiasm for bees was contagious, and I highly recommend a
program like this for the aspiring bee keepers out there.
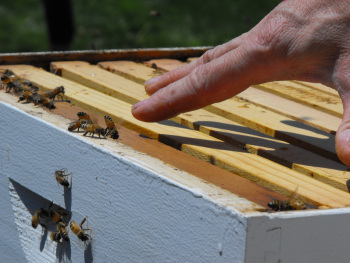 I hear from a lot of people that they're leery
of trying to keep bees because of Colony Collapse Disorder, so I was
intrigued when our teacher yesterday explained that only about 10% of
hive death in Virginia is due to CCD. On the other hand, he says
that about 30% of new hives don't survive their first winter, due to
factors including disease and lack of food reserves. (That makes
CCD responsible for the death of a measly 3% of Virginia's new hives
each year, in case you're having trouble with the math.)
Of course, you
can counteract some of the non-CCD factors....
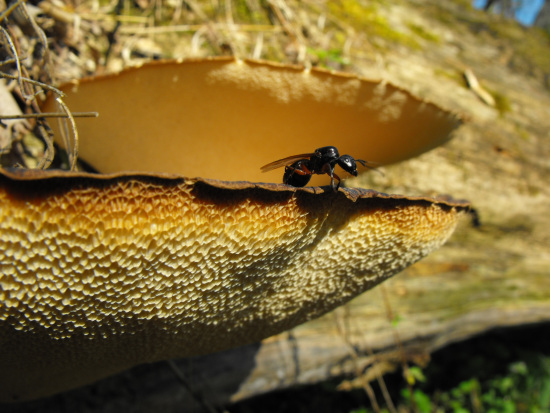
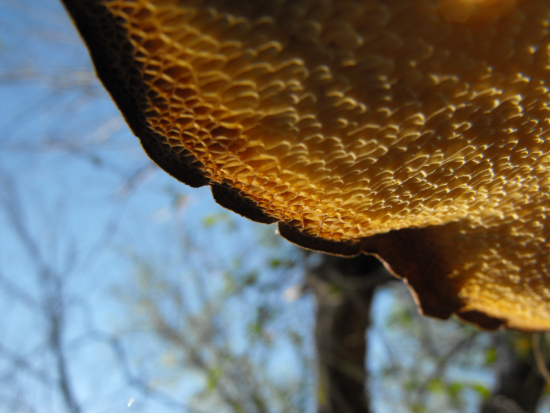
Sunday afternoon, I caught a colony of ants launching themselves from
shelf fungi for a mating flight.

A tiger beetle flew from sunpatch to sunpatch in the floodplain.

Wading down the creek, I was captivated by water strider shadows.

But, before I start, I'd like to make a quick list of qualities you don't need in your quest for
homesteading simplicity.
- Extensive knowledge of agriculture. I took a class and became a Master Gardener before I moved to the land, but it was far from necessary. In our current information age, you can learn everything you need to know from the internet and your local library.
- A partner in crime. Again, it wouldn't hurt, but it's quite possible to move back to the land by yourself.
- A nest egg. Sure would be
nice, but we've done fine without it.
| This post is part of our Homesteading Qualities lunchtime series.
Read all of the entries: |
A propane torch has thousands of uses in the world of a do it
yourselfer. The tank is usually about 2 bucks and the nozzle should be
in the 10 to 15 dollar range.
The picture shows Anna sterilizing some old bee equipment with the
power of fire. Someone at our bee class brought up the possibility of
boiling such things in large containers of Lye and our instructor's brow
actually furrowed. I think a propane torch might save hours of labor in
comparison to the boiling method?
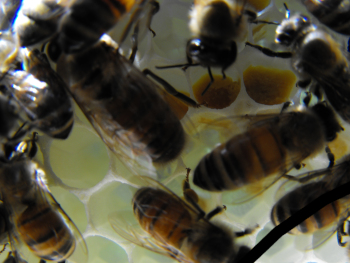 See the yellow stuff in the photo?
That's pollen, which our bees are busily socking away, along with lots
of nectar/sugar water. They also have capped brood already, which
means we'll have new adults popping out pretty soon! With such
positive signs in the hive, I tossed another super on Monday to give
our bees room to expand their egg-laying and food-storing.
Our sugar water feeder is seeing less use as the bees find natural
nectar sources around us. Bees in the garden kept me company as I
planted the first tender crops of the year --- corn, beans, peppers,
and basil. We have five beds planted and a dozen more to go in
before the end of the week!
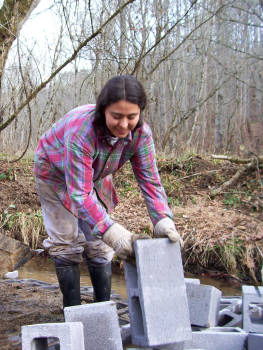 One of the most basic qualities you need to be
a successful homesteader is moderate strength. You should be able
to:
- Lift a 50 pound bag of feed to your shoulder.
- Carry a full five gallon bucket of water in each hand. (That's about 35 pounds in each hand, but you don't need to be able to lift it beyond your waist.)
- Walk a mile on level ground without getting out of breath.
- Move around
without keeling over in moderate heat (about 85 F) and cold (about 30
F.)
Don't be tempted to
assume your partner can do all of the heavy lifting for you. I'd
be sunk if I had to ask Mark to help me every time I needed to lift a
bag of chicken feed from the golf cart into the trashcan by the
tractors. He wouldn't mind, but it'd drive me crazy!
If you live in the city and dream of being a homesteader but have no
other way of moving toward your goal, it can't hurt to try to achieve
those four abilities. Step outside your climate-controlled office
and gym this summer and build up a bit of tolerance to heat. Take
a walk around the block every evening. You'd be surprised how
easy it is to achieve this level of physical fitness, putting you one
step closer to your goal!
| This post is part of our Homesteading Qualities lunchtime series.
Read all of the entries: |
I made a discovery recently in my search
for some accurate and free pedal power details.
Pedalpowergenerator.com is a one stop shopping spot for everything
pedal power. The prices seem fair, and the pictures and diagrams are
easy to follow and understand.
We acquired an old exercise bike recently and I'm sure we can modify it
to produce small amounts of electricity. Thanks to pedalpowergenerator.com
I'm a few steps closer to understanding why a charge controller is
important and where the 15 amp blocking diode is wired. The guy who
runs the site is Brad, and he only requests a few pictures of your
project if you use his plans, and to be safe and take normal
precautions.
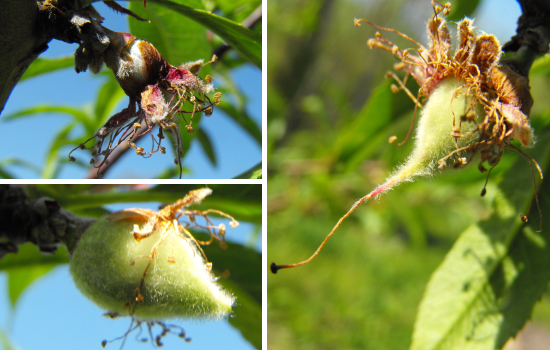
Remember how I wrapped
our two peach trees three weeks ago to keep them from
freezing? Tuesday, I noticed that a few tiny peaches are popping
out of withered flowers on the bigger tree, but I still don't know if
the wrapping did any good.
There are only about a dozen peaches forming, but is that because it's
the peach's first year to fruit and it knows better than to bite off
more than it can chew? Or is it because the other flowers got
nipped by the frost?
Are the fruits coming out of flowers which opened after the
frost? (There were a few late-bloomers.) Or did my
swaddling and water treatment do some good?
Next time I protect plants from a freeze, I'll keep better notes.
For now, though, I'm just excited that we may get to taste a peach or
two from our own soil this year!
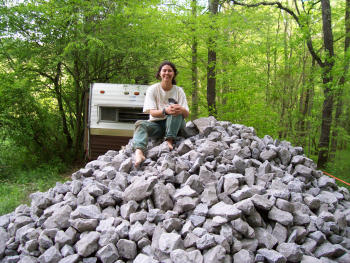 Now that we've gotten the obvious out of the
way, let's move on to the more ephemeral traits which most successful
homesteaders share. Frugality is right there at the top of my
list. If you're independently wealthy, you can probably live your
homesteading dream while also living up to the American ideal of
consumption, but most of us will have to scrimp a bit.
I saved for years before coming up with the cash necessary to buy our
farm, and since we've moved here we've realized that the farm is still
a huge drain on our finances. Every season, we have new
infrastructure we want to install --- first the trailer, then a
rototiller, an irrigation system, a mulching lawnmower, and so
forth. Rather than blowing our income on luxury items (eating
out, installing tile floors, etc.), we opt to keep our expenses down
and save up for the things that really matter.
Many folks believe they need a nest egg to move back to the land, and
while that wouldn't hurt, I don't think it's really necessary.
What you need is an ability to distinguish between your wants and
needs, to make a budget, to live debt-free, and to save, save, save!
| This post is part of our Homesteading Qualities lunchtime series.
Read all of the entries: |
Our quest for a more energy efficient
refrigerator came to an end today at a used appliance store on the way
to a muffler shop.
We got lucky and found a small recent model that is rated a bit more
favorably than the new one we were considering.
Having an energy efficient refrigerator brings us another step closer
to being ready for a practical alternative to the traditional
electrical grid.
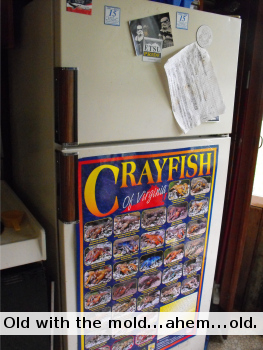 To energy star or not to energy star?
That was the question when our fridge started to die over a month
ago. Refrigerators are the single largest drain of electricity in
most households, sucking up about 14% of your energy usage.
That's money going down the drain and pollutants going into the
air. But could we afford to go green?
You can download
a very useful spreadsheet of energy star appliances' features and
energy ratings here.
I was curious about whether the label was a marketing gimmick, but
perusal of the spreadsheet made it clear that energy star fridges do
save electricity, often 100 KWH per year or more. The problem with energy star
is that new models are out of our price range, with
the cheapest ones going for over $500. No one seems to be willing
to sell used ones at all. Read more....
 While not essential, ties in a community will
really help you out as you head back to the land. I grew up an
hour and a half down the road from where I eventually settled, but my
parents are from out of state and my initial forays into the local
community were met by a steady stream of "You're not from around here,
are you?"
My parents moved to this area during a spate of back-to-the-land
migration in the '70s, so I did end up making inroads into the ranks of
back-to-the-landers of my parents' generation. Mark --- even
though he grew up in Ohio --- seems to do a much better job of gaining
acceptance by normal locals though. In part, I blame his
acceptance on his parents' roots in the area --- they and their
ancestors lived an hour away from our farm for generations before
fleeing the mountains just as my parents were moving in.
Roots in an area are great, but I really chalk Mark's acceptance up to
his ability to make small talk. He's able to head down to the
little hardware store in town and talk about the weather at great
length --- the sign of a true local. If you have to settle
outside your home county, it's worth taking a little extra time to
shoot the bull with everyone you meet for the first year or two.
"Sure was a cold winter, wasn't it?"
| This post is part of our Homesteading Qualities lunchtime series.
Read all of the entries: |
How do you
make an air conditioner fit into a window that's just too small?
Samuel: Beckley, WV.
Delete the old window, put it away for safe keeping. Build up the empty
space layer by layer. Most folks will mount their unit in the middle in
an attempt to be symmetrical. I did this last year and missed out on
not having a window I could open.
The picture shows an alternate method of tucking it into the corner,
which provides more stability and just enough room for a small
window/door on the side. Building up the space in layers allows you to
use up pieces of scrap material, which keeps the price of this project
under the cost of a cup of coffee.
Want more in-depth information? Browse through our books.
Or explore more posts by date or by subject.
About us: Anna Hess and Mark Hamilton spent over a decade living self-sufficiently in the mountains of Virginia before moving north to start over from scratch in the foothills of Ohio. They've experimented with permaculture, no-till gardening, trailersteading, home-based microbusinesses and much more, writing about their adventures in both blogs and books.
