
archives for 03/2009
March is the real
beginning of the gardening season in zone 6 --- here's a rundown of
our planting schedule. Everything goes directly in the
ground with no protection, unless otherwise noted.
 March 1-7: lettuce (in a
cold frame), onions from seed, shelling peas, collards, kale, spinach,
swiss chard
March 1-7: lettuce (in a
cold frame), onions from seed, shelling peas, collards, kale, spinach,
swiss chard- March 8-14: snow peas
(second planting), shelling peas (second planting)
- March 15-22: carrots, poppies, parsley
- March 23-30: cabbage (set out seedlings), Irish potatoes, sweet potatoes (start indoors now to be set out in May)
In addition, now's a
great time to finalize your garden plan for the year --- don't forget
to rotate your families from last year! Be sure to add some
organic matter to your beds as you plant them. And don't forget
that
March is the best time to prune your fruit trees, too.
I rudely evicted what seemed like hundreds of
ants from a cozy piece of firewood I was chopping today.
It was a Gulliver
like moment where I felt briefly rotten for causing such a huge housing
problem for this little colony of ants.
That feeling lasted about 10 seconds and was quickly deleted with the
help of our roaming chicken and her appetite for all things small and
insect like. The warm fire in the wood stove also went a long way in
soothing my ant guilt.
 March dawned cold and wet --- I hope the month
remembers to go out like a lamb. We scrambled to come up with
firewood, lucking upon a fallen Black Locust snag which was dry and
burned hot, though split only with much effort. Warmer weather
had better come soon or we'll be out of seasoned wood!
I spent most of the weekend lounging on the couch with the cats,
engrossed in my forest gardening book. Sunday evening, I pulled
my head out of the clouds long enough to walk Lucy, catching a glimpse
of a sleek mink by the creek which slipped into a hole before I could
get the camera out of its bag. Back inside, I checked out my
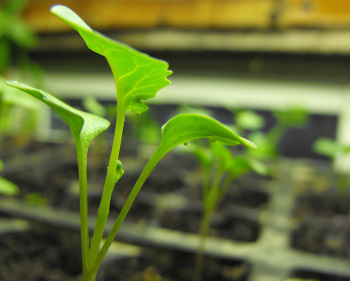
broccoli and cabbage seedlings, which are growing well (though a tad
leggy). Most have one true leaf and this one is already working
on leaf number two.
 For this week's lunchtime series, I thought
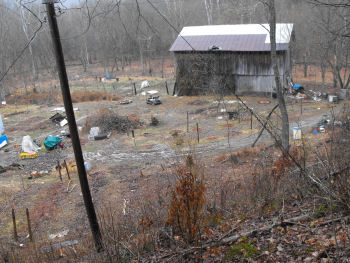
you all might enjoy seeing the initial planning stages for our new forest
garden. This photo shows the area we'll be working with ---
the worst part of our garden, full of weeds and waterlogged clay
soil. The book recommends first articulating our broad goals and
the specific factors we hope to use to achieve those goals, speaking in
the present tense from five or ten years in the future when our goals
have been met:
| This post is part of our Planning The Forest Garden lunchtime series.
Read all of the entries: |
Today required a trip into a nearby town for some tire
repair, a spark plug purchase, and a library visit. I discovered a park
down by the river which was jumping up and down while yelling "come and
take some pictures of me".
I'm always intrigued by the waste material that can be found alongside
the railroad tracks in this country. These heavy steel plates are what
seem to hold the actual track in place and I guess they need to be
replaced from time to time? I wonder if they can be used for
anything non railroad related?
 Sheet mulching, lasagna
gardening, and no-till farming are all related by the effort to
grow crops without disturbing the soil. They're trying to prevent
the damage done by tilling, a common practice which mixes soil
profiles, kills important soil organisms, and often causes
erosion. Instead, thick layers of organic matter are applied
right on top of untouched soil, mimicking the leaf litter layer in a
forest which prevents weed seeds from sprouting, holds in water, and
provides a home for many soil organisms.
I would love to lasagna garden, but I just don't have the excess
organic matter it requires. I do intend to include some sheet
mulching in my new forest garden, though, especially where the Japanese
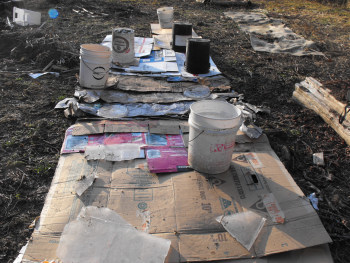
honeysuckle is so bad. Monday afternoon, I tore up some old
cardboard boxes I had in the barn to start the big golf cart path which
will run through the north end of the forest garden. For those of
you without access to my new favorite book, here are
the basic steps of a sheet mulch....
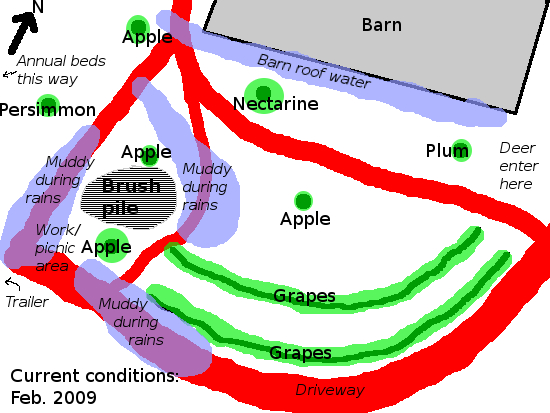
The next step is to create a base map showing the current conditions at
the site. The area I'll be working with is bounded by the
driveway on the south, the barn on the north, and a major thoroughfare
on the west. Young fruit trees and grapevines are surrounded by
clay soil which ponds during rains. A three year old brush pile
is slowly rotting down, but is still a major feature of the
landscape. The site is mostly sunny, though the hill on the south
side shades it on winter mornings. We don't get any wind to speak
of back here in our holler. Read more....
| This post is part of our Planning The Forest Garden lunchtime series.
Read all of the entries: |
If you can multiply the day by the month
and
it equals the last two digits of the year, then you are in the middle
of Square Root
Day.
This fantastic gift from the multiverse of numbers is a puzzle that's
only offered nine times a century, and so far has only been realized by
.09 percent of the population.
Is it a coincidence that it falls on the ninth year of this
century...with .09 percent believing...and only nine times every 100
years? Will you be the next to solve this mathematical brain teaser and
join the ranks of this shrinking population, or are you like me and
have yet to discover the full problem much less even part of the
solution?
Make your plans now for the next Square Root Day which will be April
4th 2016.
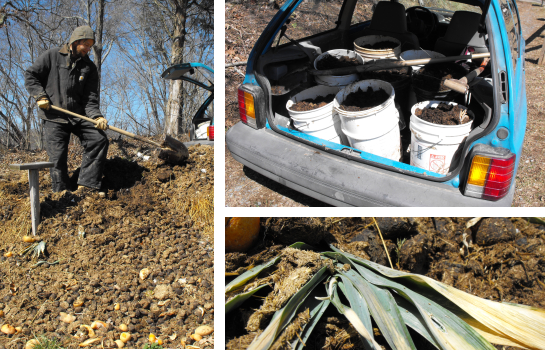
We gathered another load of manure Tuesday afternoon. Last winter
at this time, our pickup truck was working and we hauled manure in the
truck and on a trailer behind the truck. I shovelled a lot of
that manure four times --- into the pickup, out of the pickup into a
heap on the ground, into a wheelbarrow, and then from barrow to
bed.
Phew!
This year,
without a pickup truck, we're instead shovelling manure into five
gallon buckets. Given our ultra-fuel-efficient car and the one
mile drive from farm to farm (8 cents per round trip), this method
actually seems to work better. We only shovel the manure once,
into the buckets. After that, we can lift the buckets into the
golf cart, and then pour them individually onto our garden beds.
But an even better way is on the horizon --- we ran into another
neighbor who told us that if we help him shovel out his barn he'll
drive a whole flatbed dump truck load to our garden. If Mark had
a more envious disposition, he would have been jealous at the lust
which leapt into my eyes....
| This post is part of our Planning The Forest Garden lunchtime series.
Read all of the entries: |
The original super
splitter repair managed to keep the maul head from flying off at
the handle after several hours of repeated use, but the space in
between the maul and the handle has increased along with a wiggle
action that seems to be getting worse.
I used about half of each tube in a Devcon
two part epoxy kit. This stuff is very strong, but I've never
tested it on such extreme pressures as what it's about to go through
once the chopping starts back up. Stay tuned to see if it's strong
enough to hold up under real world conditions.
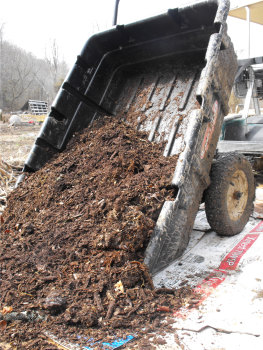 I took advantage of the last few hours of
frozen ground yesterday to haul in a load of composted wood chips to
add to the sheet mulch. The wood chips have been sitting in our
parking area for about three years now, I think, and as I shovelled
them up I felt they were almost too good to lay down on a path.
Many of the chips had decomposed into rich brown dirt, and the nearby
trees had begun to sneak their roots up to steal the bounty.
I suspect that may be our last trip in the golf cart for several
days. I'm thrilled by the forecast warm weather, but it's going
to turn the driveway to goop before the ground starts to dry. No
driving for a while!
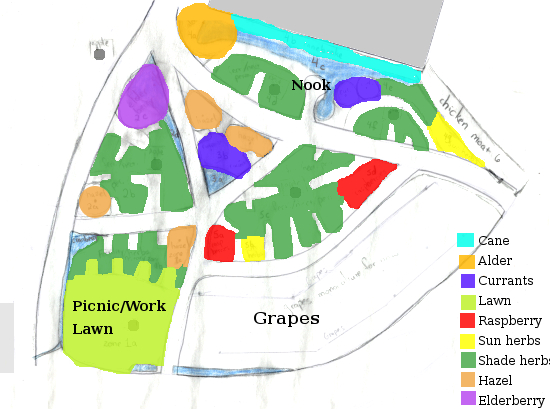
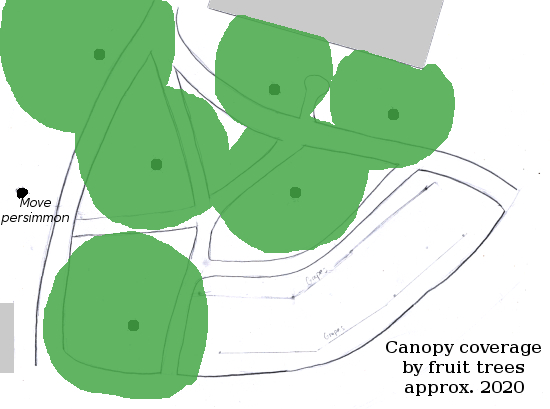
Based on the wetland and eventual canopy locations, I filled in plant
groupings on the map above. This was a pretty complicated step,
which I'll go into in far more detail than you'll care for.
First, I listed all of the plants I was interested in growing,
focussing mainly on plants which will increase fertility of the soil
but throwing in some nectary and edible plants as well. Then I
narrowed the plant list down to those which I can get my hands on for
free (primarily on my own property), or which I'm willing to spend
money on.
Next, I grouped the plants of interest into categories based on
disturbance intensity, sun/shade, and moisture level. The categories
are as follows...
| This post is part of our Planning The Forest Garden lunchtime series.
Read all of the entries: |
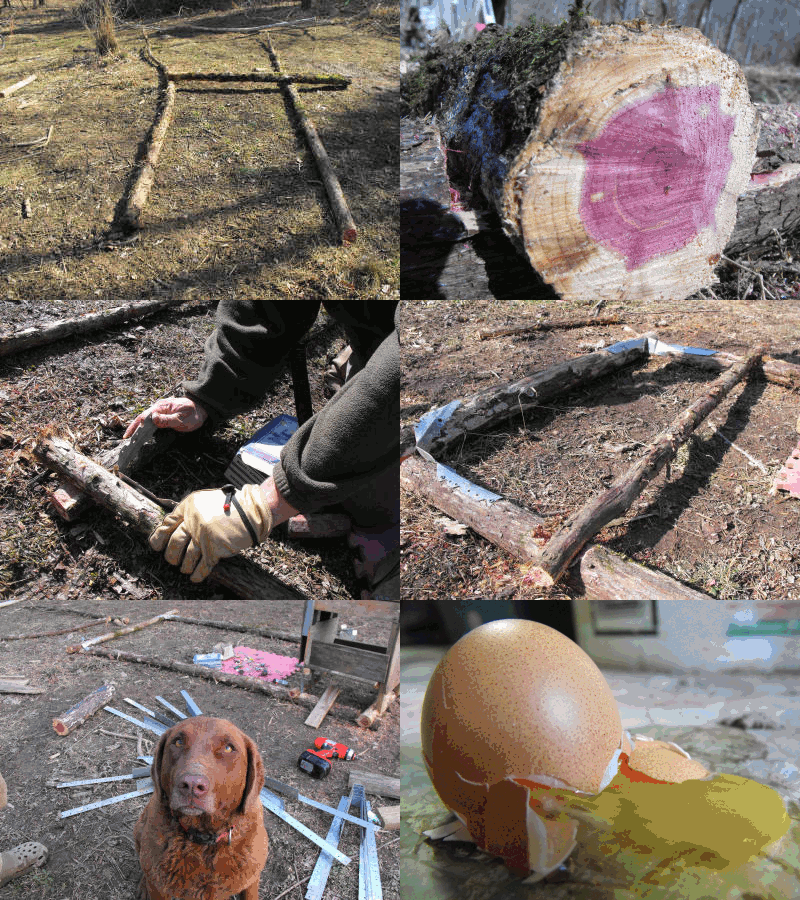 Today was a good day for working outside and
building the first stage of our newest chicken tractor or chicken ark
if you live in the United Kingdom.
I feel it's important to build the nest box first once you have the
frame together. Place it at least a foot above the ground with a big
enough hatch for easy egg access.
I've found that the more comfortable and closed in your nest box is the
less your hens are likely to lay an egg on the ground.
Read other posts about chicken tractors:
|
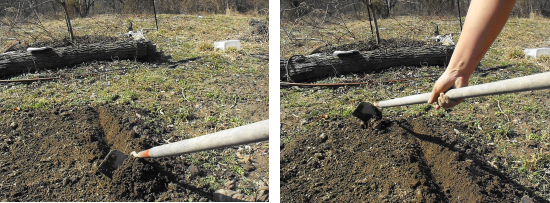
 To make a shallow planting trench with your
hoe, tilt the tool a bit to the side so that only one point of the hoe
is in the ground, then drag the hoe toward you. An even shallower
trench can be made by putting the hoe handle down flat on the ground
where you want the trench and lightly stepping on it. In
retrospect, maybe the latter is the technique I should have used since
onions seeds are only supposed to be half an inch deep --- it's been a
long time since I planted last year's onions!
To make a shallow planting trench with your
hoe, tilt the tool a bit to the side so that only one point of the hoe
is in the ground, then drag the hoe toward you. An even shallower
trench can be made by putting the hoe handle down flat on the ground
where you want the trench and lightly stepping on it. In
retrospect, maybe the latter is the technique I should have used since
onions seeds are only supposed to be half an inch deep --- it's been a
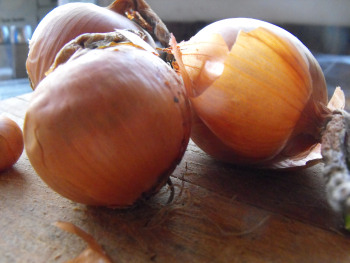
long time since I planted last year's onions!A couple more notes before you rush out and plant your onions. First of all, most people around here buy sets, but I've read that starting your onions from seed results in better storage onions (and seeds are much cheaper!) When you're choosing your seeds, be sure to know the difference between long day onions for northern gardens and short day onions for southern gardens. We're right smack on the dividing line, so we chose long day onions (Copra Hybrid, to be exact) and had great luck with them last year.
 The actual implementation of
my plan will be a subject for another time. For now, I wanted to
give you a bit more information on two elements of my forest garden
plan which I haven't explained yet.
The actual implementation of
my plan will be a subject for another time. For now, I wanted to
give you a bit more information on two elements of my forest garden
plan which I haven't explained yet.The paths in my diagram look convoluted, but there is method to my madness. I opted for a natural flow pattern based on nodes when laying out the main paths. Since the garden won't require as much routine maintenance as my vegetable garden, I've decided to use keyhole beds off the sides of the main paths. Keyhole beds provide the maximum surface area to path ratio, mimicking the blood vessels in our lungs. Next, read about chicken moats....
| This post is part of our Planning The Forest Garden lunchtime series.
Read all of the entries: |
I've noticed a few different guys around here
that regularly setup beside the road to sell a small collection of hand
tools.
This guy is named Waren, and I stopped today to chat with him about
prices.
He seems pretty fair. 15 bucks for a shovel, which might be worth the
extra 5 from what the cheap ones go for at the big stores. The two man
and one man saws are what caught my fancy. He wants 80 dollars for
both. They might make a good back up to the chainsaw.
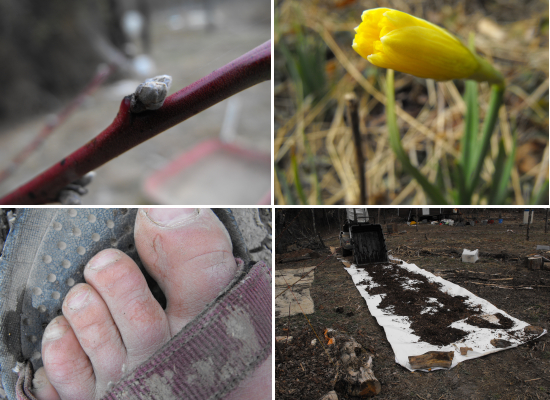
Friday afternoon on the farm --- swelling peach buds (go back to
sleep!), the first near-blooming daffodil, dirty feet, and playing with
permaculture. No photos of the spring peepers who joined the
floodplain chorus or the peas and greens I put in the ground. We
also put hen #6 in our bellies, a smooth operation which took only
about an hour (not counting the eating.) Such a perfect day to be
outdoors!
This two person saw showed up today thanks to
Anna's mom.
It took some considerable effort to cut half way through a small walnut
limb, which was not too easy on the arms, but the design is very easy
on the eyes.
Stay tuned to see how well it cuts once we get it sharpened.
 Spring has come --- if you forgot to Spring
Ahead last night, now's the time to change your clocks!
Meanwhile, I'm revelling in the beautiful weather. We're only
about 80% through our water-line-burying project, but it's so warm that
our frozen lines thawed out. I was able to fill up the washtub
and do laundry without hoisting five gallon buckets of water out of the
tank! Now that's spring!
The epoxy has firmed up nicely and looks like
a solid super
splitter once again.
I've only chopped a few logs since the repair, but I have a feeling our
problem is solved for good this time.
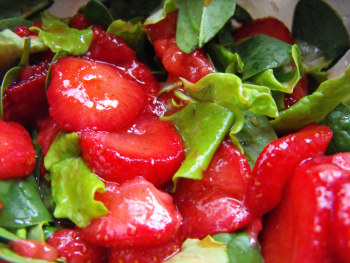 We had just enough lettuce and spinach to have
our first salad of the year on Sunday! I thawed out some of our
last home grown strawberries to celebrate and we each scarfed down our
half bowl in short order.
The weather continued to stun me, though I wasn't quite so thrilled to
get my first mosquito bite....
 Everett from Gaiam
sent us a package of entertainment to review last week. We were
both thrilled --- all of the good parts of surprise Christmas presents
with none of the more difficult aspects of the season.
Both of the books are about bees, which is perfect timing since our
bees are slated to ship in approximately a month. Stay tuned for
a review of each (and of the DVD), but for now you can see more in Gaiam's
organic gardening section. Enjoy!
I managed to get the main roost mounted today
during stage 2 of project chicken tractor.
It might not look like it now, but it's really starting to take shape.
The next step is to finish the frame around the main roost area and
then cover it to give our girls a nice shelter from the wind and rain.
Read other posts about chicken tractors:
|
 Monday was so warm that if I lay down in front
of the Egytian onion bed and looked through the green toward the sky, I
could almost believe it was summer. The chickens --- who have
been craving every iota of sun for the last few months --- begged me to
turn their tractors around so that they'd have shade. Lucy and
her doggie buddy (who's visiting for the week) slipped up into the cool
at the edge of the hillside.
Meanwhile, I chained myself to the computer for four hours, then could
bear it no more. Many people are greedy for more money, but I'm
greedy for more time in the outdoors --- once I've paid the bills, I'm
far more likely to be found in the garden than hammering down someone's
door in search of more clients. After all, don't I get more
enjoyment out of an hour in the sun than I would out of working an hour
and then taking us out to dinner or some other frivolity? I
prepared more garden beds to be planted today and pondered the careful
balance we walk between enough time and enough money.
 You can probably guess which book I went for
first --- the one subtitled "An Absolute Beginner's Guide to Keeping
Bees in Your Yard and Garden." I'd been vaguely considering
trying to take a beekeeping course before our bees arrived, and I'm
thrilled to be able to feed my antisocial side and instead read a book
chock full of photos.
The only downside of the book is that its subtitle is accurate --- it's
pretty simple and doesn't introduce more contentious topics I've read
about on the internet (like whether to use a queen excluder or
not). But after reading The Backyard Beekeeper, I still
felt like I had spent a week walking around with an expert. Cut for racy
bee sex scenes....
The main roost is now enclosed on three sides with a roof. I used aluminum flashing for the first layer which will keep it sealed
and reflect some of the hen body heat back. Flashing is cheap and a joy
to work with. It can be easily cut with a common pair of scissors.
The outer layer is some scrap carpet that worked out really well on the
other two tractors. It seems to provide a nice layer of
insulation. If you don't have any scrap carpet handy and you're not the
type to scrounge for some at the dump then I recommend a section of
that astro turf carpet they use on miniature golf courses.
Read other posts about chicken tractors:
|
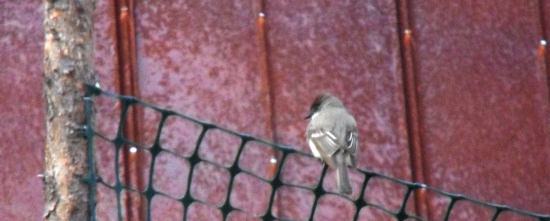
I even saw the season's first butterfly Tuesday --- a comma (or maybe a question mark --- I need a book to distinguish the two.) This time the book told me that the sighting wasn't too far out of the ordinary, but I couldn't help being a bit fearful of the big G.W. (global warming, that is) as we dip down from zone 6 and into zone 7 (according to the National Arbor Day Foundation's revised zone map.) One of my gardening friends plants everything a couple of weeks earlier than she used to, and says that we definitely have dipped into a warmer zone.
While Mark finishes up King Corn and I finish up Letters from the Hive, I thought
I'd take this chance to get to know all of our new readers. Time
for a poll! Feel free to add any additional thoughts in the
comments section.
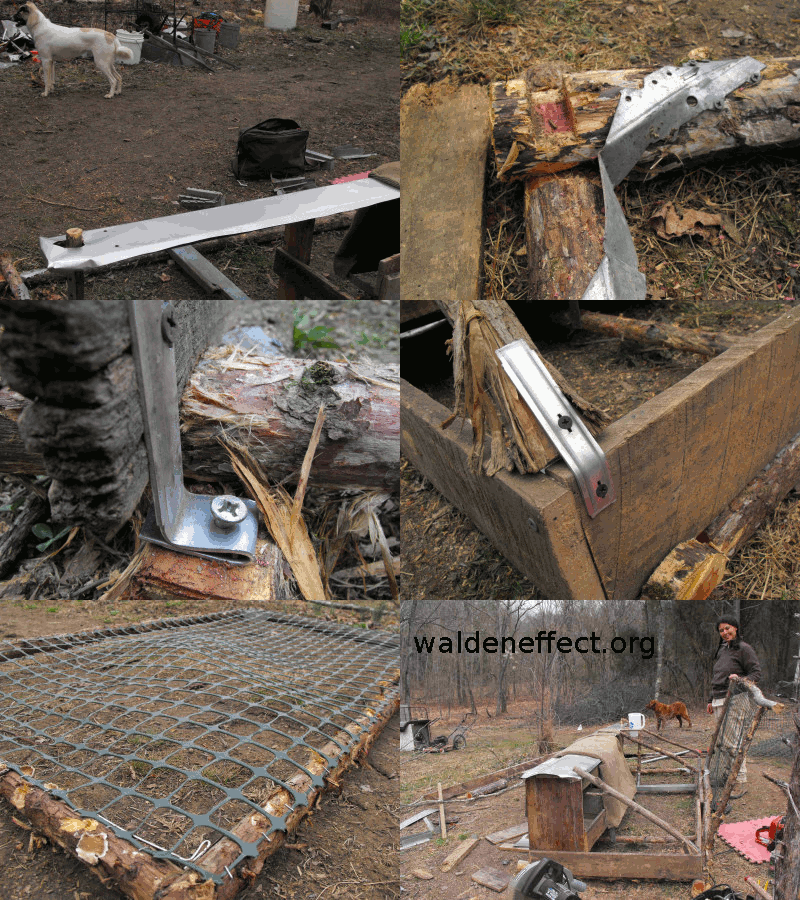
I finished covering the top area with flashing and completed the carpet
enclosure for the main sleeping roost. Got some barks of approval from
Lucy and her friend Curly. They recommended I make an over sized access
door and I'm glad they did. Now we have a big enough opening to stand
inside the tractor once it's open.
At this pace I should have it ready for a chicken test drive sometime
tomorrow afternoon.
Read other posts about chicken tractors:
|
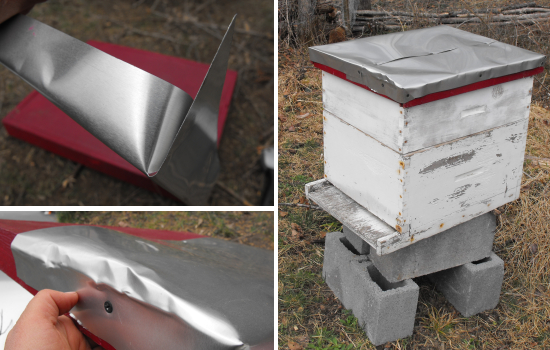
 Mark had all the tools laid out around the
chicken tractor, so I decided to finish up my bee box exterior
covers. The result is very serviceable, but I wish I'd taken the
time to measure and bend the flashing a bit more carefully --- the
picture on the lower left shows what happens when you bend your
flashing wrong and have to rebend it....
Mark had all the tools laid out around the
chicken tractor, so I decided to finish up my bee box exterior
covers. The result is very serviceable, but I wish I'd taken the
time to measure and bend the flashing a bit more carefully --- the
picture on the lower left shows what happens when you bend your
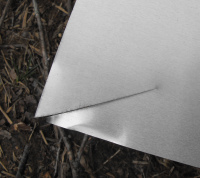
flashing wrong and have to rebend it....You can probably guess what I did from the photos, but if you can't --- first, I cut two pieces of flashing a bit longer than the length of the exterior cover. I made a small cut in two of the corners (shown at right) and then bent the flaps over to make a corner (top left). As I went along, I realized that the sharp corners were potentially hazardous, so I folded them under a bit. Then I screwed the flashing onto the top of the cover, and repeated with another piece on the other side. Our bee box is nearly ready for bees!
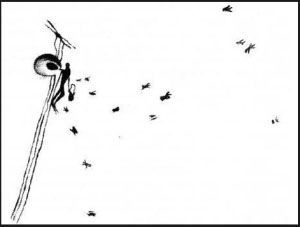 Did you know that the lives of bees and
man have been intricately intertwined for thousands of years?
That cave paintings on several continents (like the one reproduced
here) depict epic journeys to rob honey from wild bees?
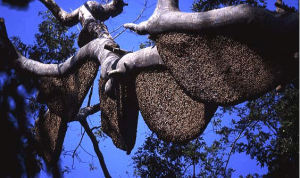
Did you know that a species of giant bee in Asia builds unprotected
combs on the undersides of tree branches --- combs that are six feet long (shown below)?
People harvest these massive combs in the wild with rope ladders, woven
buckets, and knives carved from bone since mythology suggests that the
bees are angered by metal.
 In Mexico, the Maya took care of stingless
bees. They carted home inhabited logs then reached in with their
unprotected hand to yank the honey out at intervals. These
stingless bees are still cultivated, though they have lost ground to
the introduced honey bee which has the downside of stinging but the
upside of producing more honey per colony.
As you can tell, Letters
from the Hive was right up my alley --- a field entomologist's
rivetting tale of the relationship between people and bees.
Really good non-fiction like this is a lot like really good science
fiction --- it takes you to a world beyond your imagination.
The new chicken tractor only got an hour of my
attention today, but it was a good hour.
Green plastic netting is my new favorite material for covering these
things. It's easier to cut and manage than traditional poultry wire and
I think it looks better. Small dry wall screws seem to be the perfect
choice for attaching the larger corner sections of the netting to a
wooden surface.
It's always a good feeling to see a rough design in my imagination go
from mental chalkboard to reality. I'm tossing around an idea of maybe
building another tractor after this one and offering it for sale on
Craig's list complete with hens. Of course that would depend on how
broody our new hens will be once we get a rooster. The first generation
of Golden Comet girls just refused to go down that road. Maybe it was
something last year's rooster said or did?
Read other posts about chicken tractors:
|
 Today was one of those farm days where an
emergency crops up and you have to spend all day treading water just to
catch back up. Overnight, Strider had climbed 30 feet up a box
elder to escape the dogs, and he refused to come down.
I tried coaxing him from our seven foot ladder, to no avail. Next
try was throwing a rope over the branch and hoisting up a bucket with
tuna in the bottom in the vain hope that he might be tempted to jump in
and be gently lowered to the ground. Hah!
We figured that if we made him a ramp, he might be willing to walk down
a gentler incline. But by this time (after lunch), he had
hunkered down and wasn't willing to try to walk down our carefully
rigged up ramp. Read more....
 It's been a while, so --- time for a giveaway! We're
passing on the Letters from the Hive book and King Corn DVD that Gaiam so
kindly sent us to review. (I try to keep our bookshelves pared
down to the bare minimum, so if we're not going to read or watch
something a second time, on it goes to a new home.)
We're trying out a new giveaway method because we like to hear from our
readers and we don't hear from you all enough. To enter the
giveaway, just leave a comment on any post by April 13. I'll
throw your name in the hat (multiple times if you make multiple posts)
then contact the winner through the blog in April. That way you
have an incentive to leave us lots of comments. :-) I look
forward to hearing from you!
Edited to add: Mark's decided to throw in some daffodil bulbs and a chamomile plant to get your flower/herb garden started too!
The astute reader will notice that
we never posted a review for King Corn. We're at a bit of a loss
because we didn't really like it, but some of our friends recommended
it highly. It takes quite an awesome movie to make it through my
anti-documentary mentality, so don't
be turned off by my negative feedback
here!
The new chicken tractor had its first voyage
today across the garden to a new location near the berries.
We discovered that a well placed furniture dolly under the heavier nest
box end made pulling it long distances downright easy.
I installed a couple of lawn mower wheels on the last tractor and it
just didn't seem to be worth it. The furniture dolly is a good
compromise because it can be taken away or switched to another end or
side without much effort. The new occupants seem to be happy with their
new home.
Read other posts about chicken tractors:
|
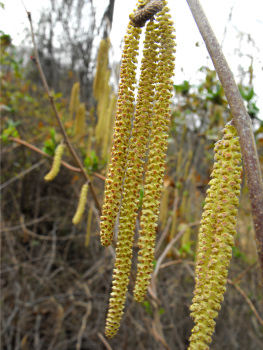 The weather has cooled back down, which is
probably a good thing since spring was starting to feel a bit like a
runaway mule. I haven't pruned the rest of my fruit trees yet,
but the peach buds are already starting to swell and show their first
signs of color (green, not pink yet.) As you can see, the wild
hazels I plan to transplant into my forest garden are already in full
bloom. Whoa, whoa, whoa!
For those of you with fruit trees already starting to bloom (Mom,
Daddy), here's a very useful chart
to show you which temperatures can harm them. It's worth watching
the weather forecast and your fruit tree buds very carefully at this
time of year, since you can often protect trees in an emergency by
covering them with
sheets or even turning on a sprinkler. We can't have a repeat of
last year's fruitless summer!
Dmitry Orlov came out with a book last year
titled "Reinventing
Collapse" where he compares the collapse of the Soviet Union with
what's going on now in the United States.
His attitude towards this bleak version of our future has a surprising
upbeat tone to it. He points out some simple things we can change now
to be better prepared for what he envisions as a tough ride.
I got attracted to his way of thinking by watching this very
informative interview
on Russian television. His blog
has even deeper articles he's written on the subject, including a
radical way of using sail boats to solve some of the problems he
predicts are already unavoidable.
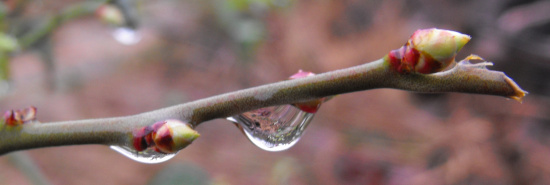
A mass of blueberry
bushes arrived in the mail on Friday afternoon --- thank you Heather
and Kira! They've been heeled in while Mark and I prepare their
new homes, a process that may take a few days since some box-elders
have to come down to provide light and I have to acidify the soil,
which is currently too wet to work.
Soil acidification appears to be a more contentious topic than I
knew. Most people add sulfur to lower soil pH before planting
blueberries, but I've read a few reports that the sulfur gives the
berries a bitter taste (and I'm always leery of chemicals.) Other
people suggest modifying the soil with tea bags and citrus peels, both
of which we have in profusion. Or peat moss (which I'm morally
opposed to, so won't use) and/or decayed pine needles (which we have
plenty of up on the hill.)
Luckily, my friends picked out two plants of each variety, so the
solution is obvious --- a paired experiment where I acidify the soil
for one set of plants chemically and for the other naturally....
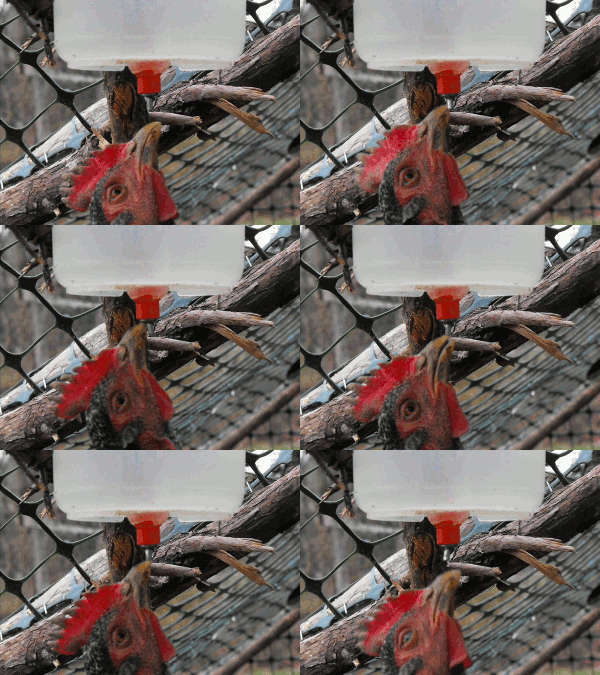
Since the ceiling in this chicken tractor is
so low I couldn't hang our automatic chicken waterer from the top the way I usually
do. Instead I cut a hole the size of the container in a piece of
plywood and mounted it at the appropriate height.
It seems to be working out very well, and is even easier to service due
to the fact that you don't need to open the door to access the water.
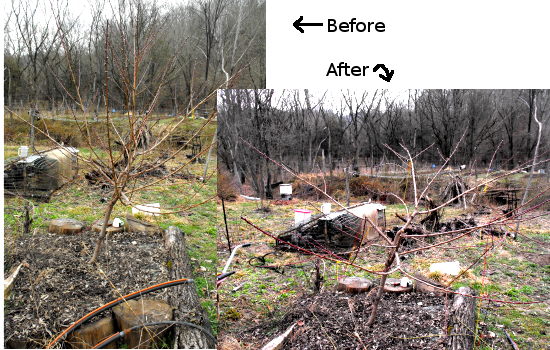
I'm such a novice
pruner, having only dabbled in it for the last three years and only
really seen the results of my pruning this year. I figure in
about a decade, I'll feel like I've got my feet under me. In the
meantime, I cut and hope.
I'm pruning all of my fruit trees to one of two forms --- the central
leader system (apples, pears, cherry) or the open center system
(peaches, nectarines.) Since I pruned most of my apple trees in
February, I'm focusing on the open center system here, which is a lot
more difficult for the novice, in my opinion. The purpose is to
keep the tree short and spreading so that the maximum amount of
sunlight reaches the leaves and fruit (and the fruit is easy to
pick.) Unfortunately, this pruning technique goes directly
counter to a tree's natural growth system --- straight up. Read more....
 I've been on a quest over the
last few months to find a way to produce my own edible mushrooms.
The obvious answer --- what we did --- is to buy commercially developed
spawn to start cultures in our logs. But once we have shiitake
and oyster mushroom logs fruiting, it seems like we shouldn't need to
keep buying the pricey spawn. Can't we save our own "seeds" and
start mushrooms from scratch?
The internet gives a pretty resounding "no." Most discussions
tell you that you need sterile laboratory conditions to produce your
own spawn, at an estimated cost of at least $1,000 to get
started. Way out of our price range.
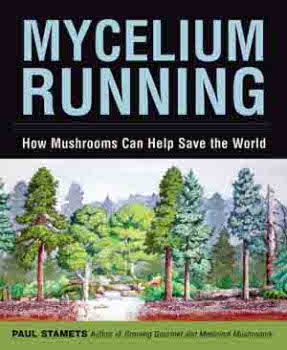
Then I stumbled across a reference to Paul Stamets' Mycelium Running: How Mushrooms Can Help
Save the World. Through the wonders of interlibrary
loan, I now have this enticing book in my grubby little hands.
The book tells me "yes we can!" --- it's quite possible to reproduce
your edible mushrooms on the cheap.
I might try the ancient
technique of cutting new logs for our shiitakes and placing them
underneath our existing fruiting logs, hoping that spores will fall off
the shiitake mushrooms and grow on the new logs. For our oyster
mushrooms (and the wild morels we find in the woods), though, there are
some more exact options. This week's lunchtime
series will cover the most interesting techniques, the ones I hope to
try this year. Stay tuned!
| This post is part of our How to Cultivate Mushrooms for Free
lunchtime series.
Read all of the entries: |
This picture illustrates how our little creek has grown up to be a
mighty river in the last couple of days. With a bit of luck we'll mount
a salvage operation tomorrow morning to reclaim a rather large wooden
beam that seems to have floated our way and lodged itself nicely
against a Box Elder tree by the footbridge.
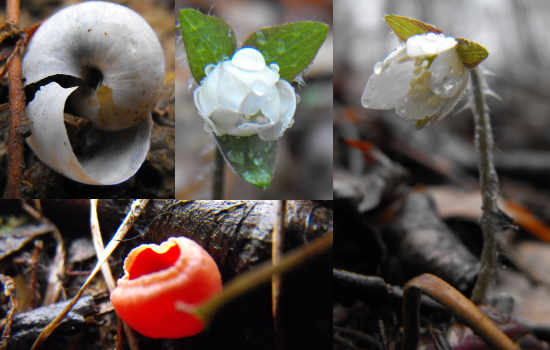
When March begins, the
speedwells and dead nettle and bittercress start to bloom in the
yard. Then come the first tree flowers --- elm and maple twigs
with little blooms you would hardly notice unless you were looking for
them. But for me, spring isn't really here until the first early
spring ephemerals pop up in the woods. Monday was the day!
I found a grand total of two hepaticas, each semi-closed in the rain,
but I know that by next week at this time the woods will be brimming
with life!
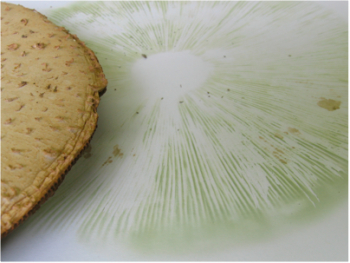 Technique 1: Producing spawn from spores
The biology is a bit complicated, and I won't go into it here, but
spores can be used to start new mushroom colonies a bit like seeds are
used to start new veggie gardens. The trick is to get the spores
to grow, and Paul Stamets suggests two
options.....
| This post is part of our How to Cultivate Mushrooms for Free
lunchtime series.
Read all of the entries: |
It was a perfect day for cutting down trees, and appreciating the
springlike weather.
 Spring is in the garden --- we've eaten our
third salad of the season, are eying the asparagus shoots we're not
allowed to eat this year, and are watching the first peas twine up out
of the ground. Meanwhile, I transplanted the broccoli and cabbage
seedlings we
started indoors
into a cold frame, wishing I'd started them there from the beginning.
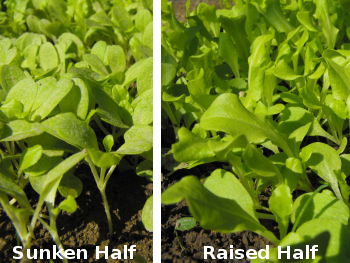
Our sunken cold frame
experiment is ready to analyze --- no hard data, but these
photographs speak for themselves. The lettuce in the normal
height part of the bed is about a week ahead of the lettuce in the
sunken portion. I guess that light, not temperature, is the
limiting factor for lettuce in the early spring.
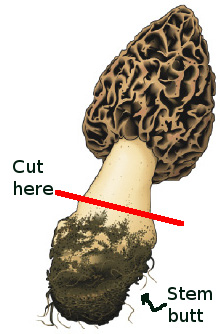 Technique 2: Producing spawn from stem butts
An alternative to starting with spores is to start with stem
butts. This technique works well for morels and oyster mushrooms
and allows you to clone a mushroom strain. (Using spores allows
"cross-pollination" (not really, but close enough) similar to how
gathering seeds from butternut squash grown near a pumpkin would result
in a new variety.)
First, gather your mushroom carefully, being sure to pull up the
bulbous base and a bit of the root/hair-like growth branching out from
the base of the mushroom --- this area is called the stem butt.
Cut the stem where it begins to narrow above the butt and discard the
top (aka, eat it). The stem butt can then be used to make spawn
in several ways, the ones I'm
most interested in being....
| This post is part of our How to Cultivate Mushrooms for Free
lunchtime series.
Read all of the entries: |
The hand dug well now has a small access port two feet below the
surface.
I'm installing a short section of water hose to make raising and
lowering of the pump trouble free.
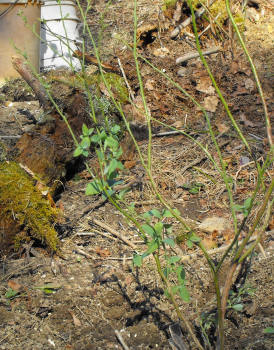 With the overshadowing trees down and the
ground dry, I finally put our wedding blueberries into the ground
Wednesday afternoon. Their new home is on a bit of a slant, so I
dragged some decaying pine trunks out of the woods to form an erosion
barrier on the downhill side of each row. I'm hoping that the
rotting wood will provide nutrients for the blueberries and acidify the
soil a bit, too. Since pines and blueberries are often partners
in nature, it's possible that some helpful fungi will come along for
the ride and pep our little bushes up.
With my last few gasps of energy, I planted parsley, carrots, and
poppies in the garden. My various clients all need computer work
done ASAP, so I guess it's a good thing it's supposed to rain tomorrow
and keep me indoors....
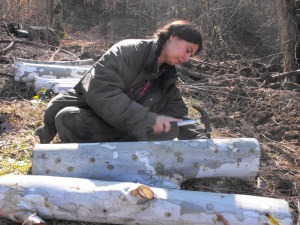 Two methods of inoculation
So now you've got spawn in some form or another. What do you do
with it? This stage is called inoculation --- getting the spawn
into its new growing medium.
The dowel spawn can be pounded into logs and stumps just like we did in
February. I suspect that cardboard or broth spawn could be
turned into dowel spawn by mixing the two and waiting a while.
Another inoculation method
which looks like fun is the spore
oil technique....
| This post is part of our How to Cultivate Mushrooms for Free
lunchtime series.
Read all of the entries: |
Sometimes the latch mechanism that holds a
hood down can get sticky, not allowing it to close all the way.
The easy fix is to use a screw driver to activate each of the two
springs while dropping a few drips of oil where the metal moves. It's
also a good idea to lubricate each end of the control cable.
Open and close the hood several times to let the oil work its way back
into the grooves.
Those of you with long
memories will recall that I was thinking of
printing up some notecards with Walden Effect images on them a few
weeks ago. That got bogged down in my native distaste for
marketing --- I love making art, but the matting, framing, and selling
sides of it drive me nuts.
Then the internet came to my rescue! Imagekind lets me upload
my images, then they turn them into prints of various sizes or
notecards whenever someone asks for them. It's a win-win
situation --- I get to share my art and bring in a little spending
money without having to find a clean, dry place in our tiny trailer to
store boxes of prints and notecards. (Be forewarned that I never
physically touch the art, so I obviously can't sign the prints.)
Best of all, you can set up a free account as long as you don't want
more than 24 images up there.
So, if you'd like to send a little Walden Effect to your friends, check
out our Imagekind page.
And that's it for our monthly dose of advertising. 
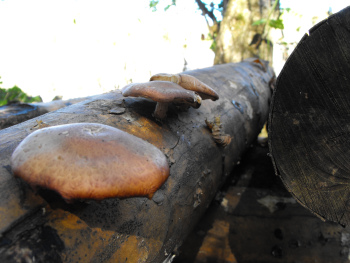 So there you have it --- several cheap or free
techniques to reproduce your edible mushrooms. I'll keep you
posted on how our various experiments go, but I'd also love to hear
from
some of you who try these (or other) techniques.
As a final note, Paul Stamets warns that different species of mushrooms
respond better to different techniques. It sounds like it's hard
to go wrong with creating new logs of oyster mushrooms, but shiitakes
might take a bit more trial and error. The book notes that
shiitake spores must be dried and then rehydrated in order to grow and
shiitakes aren't listed as good candidates for stem butt
reproduction. Sounds like a good challenge!
| This post is part of our How to Cultivate Mushrooms for Free
lunchtime series.
Read all of the entries: |
That massive wooden beam the creek delivered
last week is now on dry land thanks to a bit of help from Lucy.
I'm not sure what we'll use it for..maybe the creek knows something I
don't know?
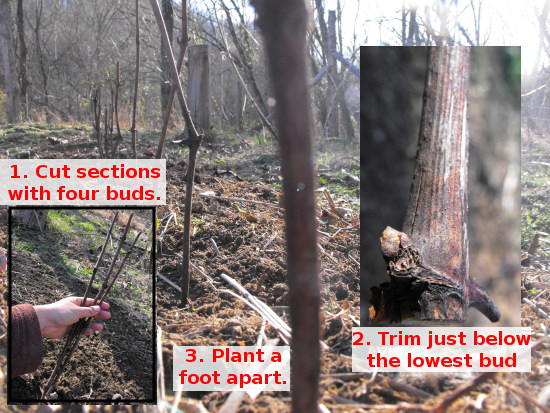
Grapes are perhaps the easiest and cheapest fruit (after strawberries) to propagate. First,
 find someone in your area who
grows grapes and offer to help them prune in exchange for taking some
of the prunings home. Trim the prunings into pencil-thick
sections with four buds apiece, cutting each one just below the lowest
bud (see above.)
find someone in your area who
grows grapes and offer to help them prune in exchange for taking some
of the prunings home. Trim the prunings into pencil-thick
sections with four buds apiece, cutting each one just below the lowest
bud (see above.)Next, soak the cuttings for three days --- this step is very important and will at least double your success rate. Finally, push each cutting into the ground so that two of the buds are submerged, making sure the buds are all pointing up.
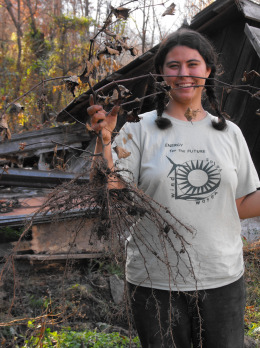
Weed and water just as you would the rest of your garden all summer, then in the fall dig up your new grape plants and put them in your vineyard. The photo to the right is a seven month old plant I started from a hardwood cutting --- granted, it was the biggest of the batch, but they all looked pretty darn good!
We've decided to add 5 medium daffodil bulbs
and some chamomile plants to this month's giveaway.
With any luck your 5 flower bulbs will multiply into a small daffodil
army within 10 years if you take the time to separate them out
once they get big enough to reproduce.
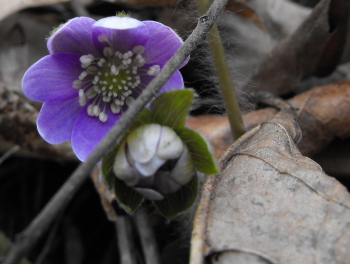 I had two people ask me
why I was morally
opposed to peat moss, so I figured I'd do a little
exposé here for those of you who
aren't in the know. Peat moss
comes from peat bogs where the moss layers on top of its parents,
forming a soggy, acidic environment which prevents decay. As a
result, the accumulated layers of moss may end up several feet thick
after a thousand years or so, creating a unique environment full of
rare plants and animals (like wild cranberries, but not including the
plant shown here which is just a pretty hepatica I found in the woods
yesterday.)
Harvesting peat moss to use in gardening is a lot like cutting down old
growth forests to make raised beds --- in a matter of hours, we can
wipe out an ecosystem which will take centuries to regrow. For
those who don't mind transporting materials over distances, coir
(coconut husk fibers) is a good replacement for peat moss in the
garden. Personally, I prefer to build up my soil with compost,
manure, and
leaf mold.
This is a standard 220 volt well pump. It
pushes a very healthy flow of water from our creek to a holding tank
about 400 feet uphill.
Last summer we managed to hook it directly up to a set of heavy duty
sprinklers for the garden, which seemed to work pretty well.
A guy at Home Depot gave me a half hearted warning on how a pump like
that wasn't designed for operation in a creek and it might be a problem
if it sucks up too much sand.
I carved out a hole in the creek bottom and secured a large plastic box
for the pump to sit in to minimize the particle intake. It seems to be
mostly free of sand, so I'm hoping this work horse of a pump can handle
what little grit is going through it.
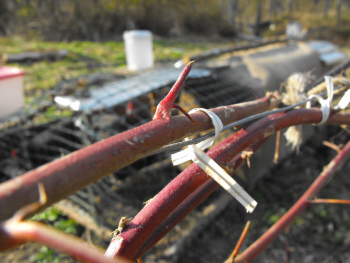 The raspberry buds are already starting to
disgorge their first tiny leaves --- time to prune and train them
before it's too late!
Two years ago, I just let my brambles (blackberries and raspberries)
run wild. But once I put them on simple trellises, my life became
a lot easier --- no more carefully lifting up thorny vines as I pushed
the mower under them, accidentally cutting through a stem here and
there.
Now I use leftover twist ties to attach the bramble vines onto the
trellis wires. As I pruned out old canes on Sunday, I realized
that the twist ties were even more utilitarian than I thought --- I
easily untwisted ties from canes I was pruning out and then reused the
twist ties to attach new canes to the trellis. A definite
training time-saver!
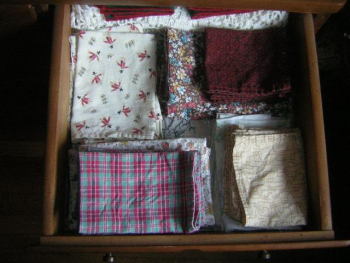 When I was young in the mountains, I sewed
cloth napkins on my 1946
Singer sewing machine. I made red plaid ones for Italian meals
and fun
butterflies for Summer feasts. I carefully packed them away. . .
Now
that I am married and we have our own home, the napkins are being well
used and I've added quite a few more to the collection. Three
years
in,
do cloth napkins have a practical use in the home? You bet!
We love
using cloth napkins and our guests feel extra special when they stay
for meals. They're a simple, frugal solution to multi-napkin
meals
(like ribs and fried chicken) and at-the-table
spills. We're not tired of folding them and when we ate meals
away
from home, I packed them in lunches. They're also a great way to
entertain babies honing their fine motor skills.
How do you get
started? Here's a few
tips....
| This post is part of our Drop the Disposables lunchtime series.
Read all of the entries: |
This picture is a perfect illustration of exactly the best way to
properly fall a large tree. I wished I had seen it before I cut my
first one down.
The notch helps guide the tree where you want it to fall, and prevents
it from sandwiching your chain saw, which is a bad thing and can be
very dangerous.
Chainsaws are louder than most power tools and require adequate ear
protection if you want to avoid long term hearing damage.
 Have you chatted with your extension agent
lately? I think that extension agents are one of the biggest
untapped resources for back-to-the-landers and homesteaders. The
extension agent is your one stop source for free soil tests, bug
identification, farming advice, and much more.
In our area, we just found out that "much more" includes $400 of free
beekeeping equipment! If you live in southwest Virginia (and I
understand there are similar programs in many other parts of the U.S.),
you can get reimbursed for spending up to $400 on hives, bees, and
other equipment --- the grant estimates it's enough to get you started
with two hives. We had been scrounging around, getting used boxes
and scrimping to buy one package of bees for this year, but if both of
our applications are accepted, we're now thinking we might be able to
get four free, brand new hives going this year!
Lest you be scared by the word "application", let me add that it
consisted of putting our contact information on a sheet of paper and
signing it. So, check your phone book or the online listings and
give your extension agent a holler!
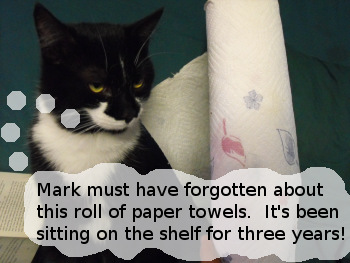 Is there life after paper
towels?
When I first suggested to
Mike that we stop using paper towels, he was skeptical. It's easy
to
see why--they're the go-to fix for almost any mess. Tear one off
to
clean up a spill on the floor or use them to drain our beloved
bacon.
It was a hard sell, harder in fact than any other green switch we
made. But really, it's so easy and inexpensive to replace your
paper
towels with more sustainable options....
| This post is part of our Drop the Disposables lunchtime series.
Read all of the entries: |
When I was growing up comic book advertisements seemed more entertaining than the super
hero adventures or Richie Rich chuckles that the medium was intended
for. I felt like the fascinating world of Sea monkeys and magic trick
gadgets held more promise than an imaginary story line that never
seemed to prove itself to be even close to believable in my real world.
I had a long list of favorites, but the one that remained on top was
the mythical x-ray glasses. I know what you're thinking...male puberty
plus x-ray glasses equal a pretty generic boyhood dream, but my motivation
for such a high functioning device was purely scientific, back when the
very thought of girls mysteriously caused me to freeze up and hide.
click
here to learn the secret of x-ray vision.
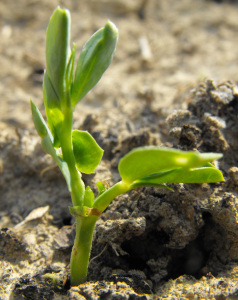 When the peas start poking their heads out of
the ground, it's time to hurry up and put in a trellis. Over the
past few years, we've explored a few different trellising techniques,
and I feel like we've finally settled on the best option.
Peas need to be rotated like most other crops --- I tried to grow them
in the same spot two seasons in a row and yields went way down.
So your trellis needs to be easy to assemble and disassemble ---
permanent posts in the ground are a pain in the butt.
I bought a bunch of light, three foot metal fence posts for about $2
apiece a few years ago, and they work great for my shorter, shelling
peas. Just pound them in the ground and string up the trellis
material (more on that in a minute) and you're good to go. Read more....
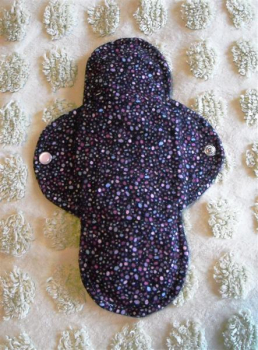 Have a happy period.
If you've got television,
you've most
likely seen the Always commercial telling you how their plastic pads
are going to make your life easier, fresher, and yes, happier. The truth is, plastic
disposable pads aren't all that great--they're
full of all sorts of chemicals, very pricey and make weird noises in
public restrooms. They're also totally not breathable and they're
boring. Yup, I said boring.
Cloth pads make sense in
many ways. They're a much greener
choice--no weird gels to soak up exponential amounts of Aunty Flo, no
pads piling up in your local landfill. They're highly breathable
and I
no longer experience the grown-up diaper rash that I had with plastic
pads. Some women find their periods are shorter and lighter with
cloth
pads, and this has been true for me. Like other cloth items such
as
napkins and diapers, you buy or make them once and use them for
years.
You can even use them postpartum. For less than $200, you can
have
menstrual protection to last five years or more.
Now to the unboring
part....
| This post is part of our Drop the Disposables lunchtime series.
Read all of the entries: |
The hose I installed going to the well pump
needed some help making it around the curve towards the water. The problem
was a slight kinking in the hose as it angled downward, resulting in a
decrease in water pressure.
The solution was a product called a kink-free
flex hose adapter. It's basically a small section of hose with a
heavy duty coil secured to the outside. I imagine a person could
fabricate one by wrapping some heavy gauge trellis wire around the
section of hose needing protection, but since I already had one of
these I went for the easy fix.
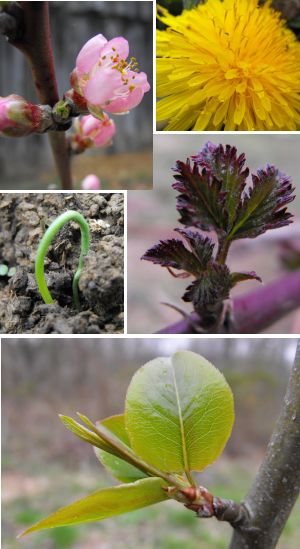 It's
been a while since I made an obsessive spring post. I hope I'm
not boring you to tears, but spring is just so exciting that I can't
help myself!
Yesterday, everything popped. I found the first wild violets and
dandelions blooming, and the nectarine tree and one of the peaches
unfurled their first pink blossoms. A young pear tree which I
could have sworn was just a stick yesterday suddenly had glossy green
leaves all up and down its stem, while nearby, purplish
blackberry leaves
had popped up.
In the garden, the first onion seedlings showed their heads (center
picture.) Last year, I pulled up a couple of onion seedlings
before I realized they weren't young weeds --- they do look very
different from all of the other seedlings in the garden!
In other news, Huckleberry --- who has been going walkabout a lot
lately ---
graced us with his presence yesterday for the first time in nearly four
days. My abandonment complex can be put to sleep for a few days!
 (Editor's
note from Anna --- the sanitary pad article yesterday was by Brandy
too, of course. I just put my name on it accidentally!)
Tell folks you use cloth
diapers and immediately get looks of surprise,
horror and disgust. Yes, I use cloth, but these are not your
mother's
diapers. They're much more absorbent, especially for night-time
--- the
only leaks I've had have been from disposables. There's nothing
creepier in the morning than pulling off a diaper heavy with the
cellulose gel that disposables are filled with. Cloth diapers can
easily pay for themselves in a year or less, depending on the type you
use, and there are few things more gratifying than knowing you will never run out.
Everything
you ever needed to know about diapers....
| This post is part of our Drop the Disposables lunchtime series.
Read all of the entries: |
There's no shortage of speculation on the
internet about colony collapse disorder, which is the name given to the
recent decrease in honey bee populations.
I'll share with you two things I've discovered that may or may not be
connected --- you be the judge.
In the May,
1988 Journal of Comparative Physiology, Sensory, Neural, and Behavioral
Physiology a group of German scientist confirmed that
magnetic field bursts at a frequency of 250 Hz induced unequivocal
"jumps" of misdirection in honey bee navigation of up to 10 degrees.
The Ground
Wave Emergency Network (GWEN) is an array of 300 transceivers
distributed across the continental United States with a spacing of
about 250 miles. GWEN was designed to transmit critical warning and
response messages that would be immune to the effects of
electromagnetic pulses, which would be generated by a high altitude
nuclear explosion. The system was supposedly replaced by the Milstar
satellite system, but it seems to me a satellite might be vulnerable
and they might want to keep GWEN on the back burner. The Wikipedia
entry on GWEN proves the system has a wide range of frequencies and
might be capable of producing signals within the 250 Hz range.
Every year we add some kind of new gadgetry to make cell
phones work better and internet's to run faster, all the while
polluting the air with electromagnetic frequencies. It's not such a bad
thing to live in a hilly area that seems to be mostly blocked from cell
phone signals and TV stations. Maybe our bees will avoid this problem
thanks to our unique geography.
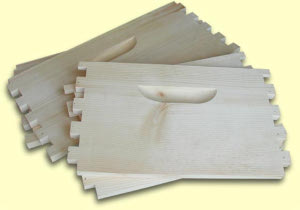 We got into the free bees program!
It's almost too late to order bees for this year, but we'll have three
more groups of bees ("packages") arriving May 7 to join our previously
ordered package arriving in mid April.
Meanwhile, we picked up all of the parts we'll need to get four new
hives going. Rather than ordering online, we found a local
father-son operation an hour and a half down the road and spent a very
pleasant 45 minutes bantering with the duo and soaking up their
combined knowledge.
I'm so excited to have all of this new equipment. Partly, it lays
my mind at rest because now I won't have to worry that whatever killed
the bees in our old equipment will kill our new bees. Mostly,
though, I think my joy stems from a childhood of hand-me-downs ---
lunchboxes with cartoon characters I didn't care for and discarded
library books under the Christmas tree. I've grown up to believe
in frugality and reusing, but something about the hand-me-down bee
boxes hit an old nerve. I wanted a fancy modern box with a
screened bottom board so that I could monitor varroa mite
populations! Now that I have it, maybe I should paint Papa Smurf
on it and lay all of those old anguishs to rest?
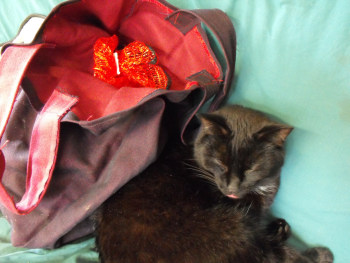 In addition to the
napkins Brandy made us, we also bought a slew of very sturdy cloth
grocery bags from her a few months ago. Mark, like Mike, had a
really hard time taking the leap away from paper towels, but for me the
grocery bags are the largest challenge.
People do look at you funny
when you bring your own grocery bags to the store in rural America, but
the really hard part is remembering to bring in the bags in the first
place. We've figured out a few simple tricks which help us steer
clear of plastic:
- Keep the cloth
grocery bags in the car. When you live a ten minute walk from
your car and a fifteen minute drive from the grocery store, chances are
you won't go back to pick up forgotten bags stashed under the kitchen
sink.
- Put "cloth bags" on the grocery list and circle it. Nothing like a reminder when you get to the store.
- Put Mark in charge of the grocery shopping --- he has the memory and is far more likely to remember the bags!
Good luck --- and
remember that every little step you make away from disposables is one
step toward self-sufficiency!
| This post is part of our Drop the Disposables lunchtime series.
Read all of the entries: |
I got some interesting feedback from a
friend of a friend today regarding yesterday's post on CCD. Thanks,
Shelia.
Shelia's friend has been working with bees for years and is up to date on the latest
research.
He points to the fact that CCD has affected beehives as far away as
Alberta, Canada, which is pretty rural and presumably out of reach of
the GWEN warning system.
On a slightly different subject, he shared with me some fascinating lab work he was
doing for the State Department to investigate the effects of microwave
radiation on rats. The grant was awarded because the Russians were
bombarding the US embassy with microwaves back during the Cold War.
They zapped pregnant rats with 100 times the dose measured at the
embassy and tested the offspring. Turns out the zapped rats were able
to learn to navigate through mazes faster than the normal rats. Insert rat race joke here.
 After putting our dozen wedding present
blueberries in the ground last week, I was surprised to learn that they
are rabbiteye blueberries, which might be either a pro or a con.
Rabbiteye blueberries are on the edge of their hardiness region here in
zone 6, which might mean we'll lose fruits to late frosts. On the
other hand, internet reports suggest that rabbiteye blueberries are
easier to propagate and care for and are more vigorous than northern
highbush.
Meanwhile, I had already ordered three northern highbush blueberries
earlier in the year. Those three arrived this week and I hurried
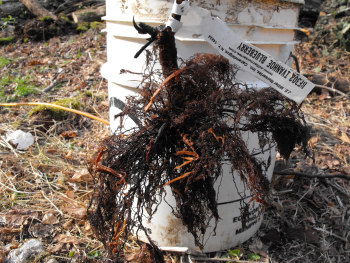
to add them to the blueberry patch. The photo above shows the
root mass of one of the northern highbush blueberries --- looks good,
huh? I didn't take a photo, but the roots of the rabbiteye
blueberries were easily three times that size (and cost $2 less per
plant), bearing out the idea that if they can survive the frost, the
rabbiteye blueberries might have a heyday in our garden. After
all, we
are probably in zone 7 now, where rabbiteye blueberries are known
to thrive. With both southern and northern blueberries
established in our garden, we should be ready for anything the climate
has to throw at us.
I thought I would end my little series on
colony collapse disorder with some conclusions that Sheila's friend
shared with me.
"The current consensus is that CCD does not exist by
itself. There is no one cause. Rather, hive vitality is
compromised
by all kinds of insults, with chemicals, physical stress, and
environment being the main categories. So the thrust of research
now
is aimed at teasing out the various contributors. Synthetic
neoniccotinoid-based pesticides are getting a lot of attention and that
work looks promising."
 In November when I quit
my salaried job with health insurance and retirement benefits, I
was
terrified. Everyone was already saying that the economy was going
to
hell in a handbasket, and folks were clinging to their jobs like life
rafts. Four months later, our income is nearly as high as it was
last year (granted, never very high working for a nonprofit) and my
stress level has gone down by about 80%.
Mark and I now firmly believe that the way to sail through uncertain
financial times is to work for yourself, diversify your income base,
and become more self sufficient so that your expenses go down over
time. As a result, we have a finger in a bunch of pies --- web
design, graphic design, videography, photography, grant-writing,
ecological consulting, and our beloved Avian Aqua Miser.
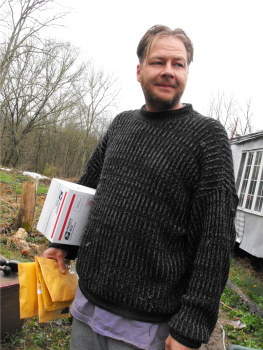
(The photo here is Mark mailing a premade unit and a bunch of do it
yourself kits.)
Read
what we've learned about advertising and freelancing....
The rain filled puddles, and the wind
whispered winter's retreat.
 Ever since I discovered the world's
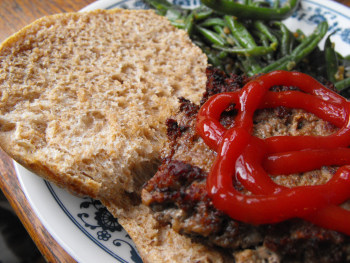
fluffiest 100% whole wheat bread, white flour has seen little use
in our house. Every week or two, I'd put in an hour or so of
effort and then serve up bread which was nutritious and
delicious. Until the inevitable day of reckoning came --- the day
we ran out of gluten.
Gluten was discovered by 7th century Buddhist monks, who mixed flour
with water and kneaded until they extracted the protein (gluten) from
the starch. Their goal was to use the gluten as a meat
substitute, but other folks discovered that if you add the gluten back
into some other flour when making bread, you increase the protein
content of the bread and also increase the fluff by an order of
magnitude.
Of course, you
can't just pour gluten into your bread dough and expect to get the
world's fluffiest bread....
I got so excited by the
marvelous world of gluten that I forgot to mention that there will be
no lunchtime series this week. Mark and I are hitting the road
tomorrow for a trip to the "north" (Pennsylvania) to visit a bunch of
friends. Blogging will be sporadic until Sunday when we are home
again.
Luckily, my brother is able to come babysit the farm --- thanks,
Joey! The one problem with having 13 animals depending on you is
that you can't just run off on a whim, even if you plan your life so
that you otherwise could. Be forewarned!
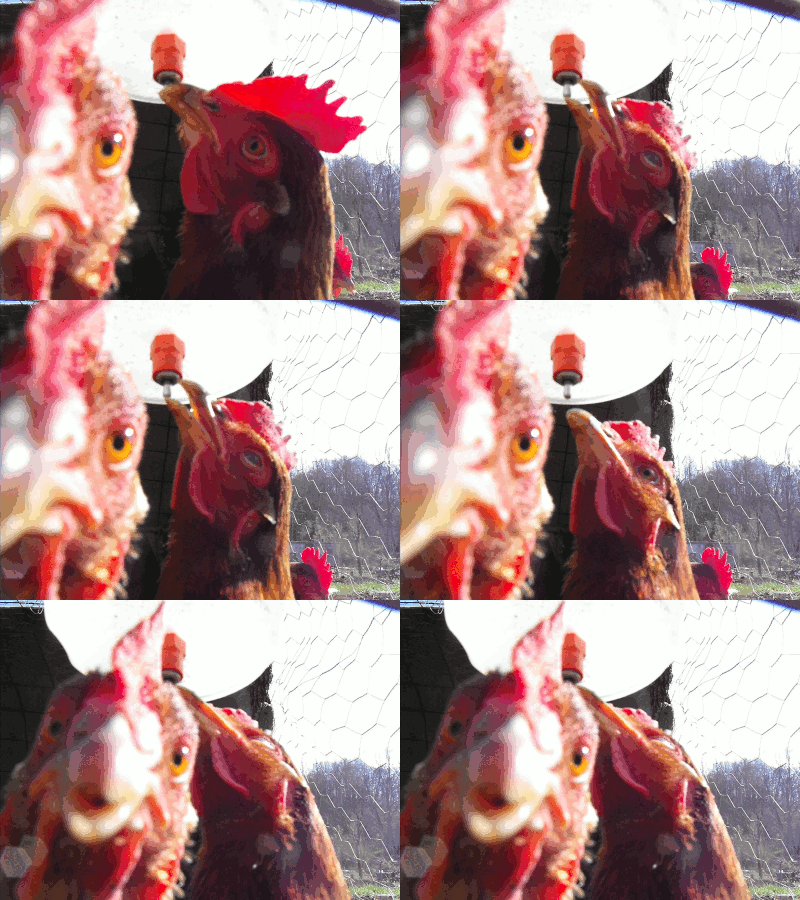 Why did you
choose a half gallon size for the Avian Aqua Miser?
Abe, New Mexico
I was trying to solve the freezing issue without running an extension
cord to each chicken tractor.
The half gallon size is easy to carry and hang up once you've carried
it inside for the night. Let it hang next to your coat and it'll be
ready to go first thing in the morning. A full gallon would be bulky, especially if you're carrying more than one at a time.
A half gallon in the Avian Aqua Miser can give up to 5 hens all the
water they need for the day. We make do it yourself kits for those with
bigger flocks. Coming soon is a version for 5 gallon buckets that can
service up to 50 birds in a day!<br
 If
you've got a small
garden and want to cut back on food bills, potatoes are a must. A
potato is a staple starch which requires no processing (unlike the more
difficult grains which must be threshed, etc.) and you get an
astounding amount of nutrients in a small space.
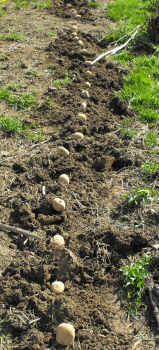
Potatoes are also one of the easiest plants to grow. Cut
your seed potatoes into sections with at least a couple of eyes (I
leave small
potatoes whole and usually cut medium 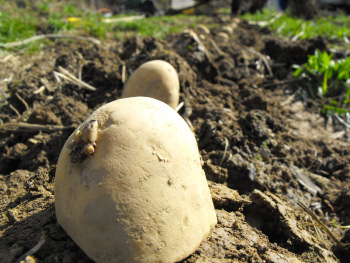 potatoes
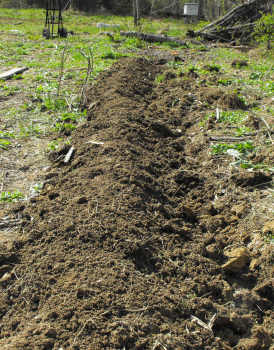
in half), space the sections about a foot apart on bare soil, then
mound more soil on top of the sections so that they're completely
covered. If you want, you can weed them later, but I've had great
luck simply ignoring my potato rows until their tops die back and they
need to be dug. (You may need to mound additional dirt up over
your potato roots if rain washes some away --- exposed tubers turn
green and are inedible.) In an hour of labor (which included
spading up all of the soil by hand), I planted 10 pounds of seed
potatoes, which will turn into about 100 pounds of potatoes to fill our
bellies.
potatoes
in half), space the sections about a foot apart on bare soil, then
mound more soil on top of the sections so that they're completely
covered. If you want, you can weed them later, but I've had great
luck simply ignoring my potato rows until their tops die back and they
need to be dug. (You may need to mound additional dirt up over
your potato roots if rain washes some away --- exposed tubers turn
green and are inedible.) In an hour of labor (which included
spading up all of the soil by hand), I planted 10 pounds of seed
potatoes, which will turn into about 100 pounds of potatoes to fill our
bellies.
Want more in-depth information? Browse through our books.
Or explore more posts by date or by subject.
About us: Anna Hess and Mark Hamilton spent over a decade living self-sufficiently in the mountains of Virginia before moving north to start over from scratch in the foothills of Ohio. They've experimented with permaculture, no-till gardening, trailersteading, home-based microbusinesses and much more, writing about their adventures in both blogs and books.
